Advertisement


mr-pimpen
-
Posts
1,294 -
Joined
-
Last visited
-
Days Won
80
Content Type
Profiles
Forums
Downloads
Bugs
WF Feature Plan
Suggestions
WebFlake Release Notes
FAQ
Store
Blogs
Applications
Ideas
Everything posted by mr-pimpen
-

how to change default url structure?
mr-pimpen replied to rokiex11's question in Invision Answered Questions
are you trying to url articles only because u cant change the urls in the forums its self that would mess your forums up...but if you are trying to just the articles to look likt this https://www.website.com/bully than what you want to do is got to Editing Page Articles only change Page Filename :Articles: leave everything in place than Articles Categories only change Name Required FURL Slug thats all -
i dont know have to get back to u on that
-
i found this if any one can help whats going on with this when adding this the hole forum dont work is there some that needs to be fixed or removed after adding these codes website is disabled from the links <div id="snow"> </div> body { background-color:#333; } #snow{ background: none; font-family: Androgyne; background-image: url('https://www.site.com/uploads/s1.png'), url('https://www.site.com/uploads/s1.png'), url('https://www.site.com/uploads/s1.png'); height: 100%; left: 0; position: absolute; top: 0; width: 100%; z-index:1; -webkit-animation: snow 10s linear infinite; -moz-animation: snow 10s linear infinite; -ms-animation: snow 10s linear infinite; animation: snow 10s linear infinite; } @keyframes snow { 0% {background-position: 0px 0px, 0px 0px, 0px 0px;} 50% {background-position: 500px 500px, 100px 200px, -100px 150px;} 100% {background-position: 500px 1000px, 200px 400px, -100px 300px;} } @-moz-keyframes snow { 0% {background-position: 0px 0px, 0px 0px, 0px 0px;} 50% {background-position: 500px 500px, 100px 200px, -100px 150px;} 100% {background-position: 400px 1000px, 200px 400px, 100px 300px;} } @-webkit-keyframes snow { 0% {background-position: 0px 0px, 0px 0px, 0px 0px;} 50% {background-position: 500px 500px, 100px 200px, -100px 150px;} 100% {background-position: 500px 1000px, 200px 400px, -100px 300px;} } @-ms-keyframes snow { 0% {background-position: 0px 0px, 0px 0px, 0px 0px;} 50% {background-position: 500px 500px, 100px 200px, -100px 150px;} 100% {background-position: 500px 1000px, 200px 400px, -100px 300px;} }
-
rung spot
-
it will still be there i did a little test and it will still stay there just hiden
-
it will stay there but it will be hide-en in your forums from guest if you use this it will show you that its still there what this do is test your website from other's and you can correct any issues this is a demo but you can buy it to get the full view iBusinessPromoter
-
you could do it like this to to make sure its gone some time add that to css it still will be there in the forum index <a class="ipsButton ipsButton_medium ipsButton_important" href="{url="app=forums&module=forums&controller=forums&do=add" seoTemplate="topic_non_forum_add_button"}" data-ipsDialog data-ipsDialog-size='narrow' data-ipsDialog-title='{lang="select_forum"}'>{lang="start_new_topic"}</a> same thing <h1 class='ipsType_pageTitle'> {lang="forums"} </h1>
-
 i think you could have done a better job little to much orange should have been lighter but the them looks ok
 -
Internal embeds not working
mr-pimpen replied to Music Case's question in Invision Answered Questions
try and disable all of your plugin and see if that works if so enable one buy one -
Internal embeds not working
mr-pimpen replied to Music Case's question in Invision Answered Questions
have you gave the permission to embed if not u must enabled to use it all so you can add the YouTube embed if you are using YouTube addons -
make you logo move side to side when mouse over Personalization -> Styles -> Your Style -> Click on </>, then click Templates and in the search bar, search for the logo. Change: replace <a href='{setting="base_url"}' id='elLogo' accesskey='1'><img src="{$logo}" alt='{setting="board_name" escape="true"}'></a> with <a href='{setting="base_url"}' id='elLogo' accesskey='1'><img src="{$logo}" alt='{setting="board_name" escape="true"}' class="brand buzz-out" ></a> Personalization -> Styles -> Your style -> Click on </>, then click CSS and in the search bar, search for custom.css. .buzz{ display:inline-block; -webkit-transform:translateZ(0); transform:translateZ(0); box-shadow:0 0 1px rgba(0,0,0,0) } .buzz:hover,.buzz:focus,.buzz:active{ -webkit-animation-name:buzz; animation-name:buzz; -webkit-animation-duration:0.15s; animation-duration:0.15s; -webkit-animation-timing-function:linear; animation-timing-function:linear; -webkit-animation-iteration-count:infinite; animation-iteration-count:infinite } @-webkit-keyframes buzz-out{ 10%{ -webkit-transform:translateX(3px) rotate(2deg); transform:translateX(3px) rotate(2deg) } 20%{ -webkit-transform:translateX(-3px) rotate(-2deg); transform:translateX(-3px) rotate(-2deg) } 30%{ -webkit-transform:translateX(3px) rotate(2deg); transform:translateX(3px) rotate(2deg) } 40%{ -webkit-transform:translateX(-3px) rotate(-2deg); transform:translateX(-3px) rotate(-2deg) } 50%{ -webkit-transform:translateX(2px) rotate(1deg); transform:translateX(2px) rotate(1deg) } 60%{ -webkit-transform:translateX(-2px) rotate(-1deg); transform:translateX(-2px) rotate(-1deg) } 70%{ -webkit-transform:translateX(2px) rotate(1deg); transform:translateX(2px) rotate(1deg) } 80%{ -webkit-transform:translateX(-2px) rotate(-1deg); transform:translateX(-2px) rotate(-1deg) } 90%{ -webkit-transform:translateX(1px) rotate(0); transform:translateX(1px) rotate(0) } 100%{ -webkit-transform:translateX(-1px) rotate(0); transform:translateX(-1px) rotate(0) } } @keyframes buzz-out{ 10%{ -webkit-transform:translateX(3px) rotate(2deg); transform:translateX(3px) rotate(2deg) } 20%{ -webkit-transform:translateX(-3px) rotate(-2deg); transform:translateX(-3px) rotate(-2deg) } 30%{ -webkit-transform:translateX(3px) rotate(2deg); transform:translateX(3px) rotate(2deg) } 40%{ -webkit-transform:translateX(-3px) rotate(-2deg); transform:translateX(-3px) rotate(-2deg) } 50%{ -webkit-transform:translateX(2px) rotate(1deg); transform:translateX(2px) rotate(1deg) } 60%{ -webkit-transform:translateX(-2px) rotate(-1deg); transform:translateX(-2px) rotate(-1deg) } 70%{ -webkit-transform:translateX(2px) rotate(1deg); transform:translateX(2px) rotate(1deg) } 80%{ -webkit-transform:translateX(-2px) rotate(-1deg); transform:translateX(-2px) rotate(-1deg) } 90%{ -webkit-transform:translateX(1px) rotate(0); transform:translateX(1px) rotate(0) } 100%{ -webkit-transform:translateX(-1px) rotate(0); transform:translateX(-1px) rotate(0) } } .buzz-out{ display:inline-block; -webkit-transform:translateZ(0); transform:translateZ(0); box-shadow:0 0 1px rgba(0,0,0,0) } .buzz-out:hover,.buzz-out:focus,.buzz-out:active{ -webkit-animation-name:buzz-out; animation-name:buzz-out; -webkit-animation-duration:0.75s; animation-duration:0.75s; -webkit-animation-timing-function:linear; animation-timing-function:linear; -webkit-animation-iteration-count:1; animation-iteration-count:1 } Only added code: class="brand buzz-out" Pretty untypical and easy way but it works.
-
Version 1.0.0
20 downloads
Non-Amazon S3 storage services do work with IPS 4.1x. Add your endpoint, key, secret, and sub-directory and custom url if needed, assign to some file category such as attachments or Gallery images and off you go! However, these Non-Amazon S3 services are NOT officially supported by IPS - that's because some of the internal methods have not been altered to handle them. These methods are hard-coded for Amazon S3 exclusively. If you are merely displaying images and the like on the front end, none of this is a problem. It becomes a problem if your end-users are going to download these files - that is when you hit the exclusively Amazon S3 code and the downloads will fail. For example, if you assign non-Amazon S3 storage to save IPS Downloads files, those files will not be downloadable. When the system attempts to make the download URL, it crafts that URL as if you were using Amazon S3, not some other S3-Compatible storage service. The two major areas that this will impact are IPS Downloads files and Attachments (this is what the file storage is called in the Files list in the ACP - it encompasses all attachments such as those you would have anywhere the full editor is used and there is an attachment dropzone.) This plugin intercepts the the URL creation method called on Amazon S3 file storage objects, checks to see if it is an actual Amazon S3 request, and then just passes it on through as usual. If it is NOT an Amazon S3 request, it must be an S3 compatible method, in which case I provide a rudimentary URL to patch this up. It isn't anything fancy: just enough headers to push out the actual file name and trigger your browser to download it. If the attachment or file in question is an image your browser might just pop it up in a new tab, in which case just right click and download it there. This has been tested with the usual modern browsers (minus Safari), and various file-types. All testing was successful. BTW, as an aside, external FTP storage for files is NOT COMPATIBLE with IPS Community in the Cloud. Might want to note that... Free, support through the IPS Marketplace topic for now. Free also means lay off the instantaneous demands for support. I use this too so it's in my interest to keep this going. Support, and this plugin's existence, continues until IPS gets around to actually officially supporting Non-Amazon S3 storage. WARNING! The only item in the entire IPS Suite that marks files as private is IPS Downloads. This plugin will flag them as public. This means a few things: 1) If you are monetizing or otherwise require to fully control access to IPS Downloads files this is probably not the plugin for you. You will need to wait for complete 3rd Party S3 support, or at least specific mods to support obj.space, Digital Oceans Spaces, and so on. It really is just some hump work on getting the signatures correct (and it might be a V2 vs. V4 dance with varying providers as well - IPS just has a hard-coded-to-Amazon V4 method). Give it time, it will happen. 2) If you are using this plugin on an already existing bucket with Downloads files, those files will need to be flagged as public-read for them to download correctly. Again, this plugin is just getting rid of the signatures to allow public files to download correctly from 3rd-party S3 providers. 3) IPS Downloads users on IPS Community in the Cloud may need to wait forever and ever before the plugin will work correctly (forever and ever being defined as more than handful of minutes) as CIC caching takes some time to get things working. You *will* need to be infinitely patient. Like, install and then go drink something for awhile, read a book, etc. Then test. Don't yell at me saying this is broken., It isn't. Tested and verified on both own-hosting and CIC. Enjoy, good luck, etc... -
there is a bug in this or i might be doing something rung when you only show to guest the nava bar goose a way and when it shows to all its there how to fix
-
Version 1.0.0
15 downloads
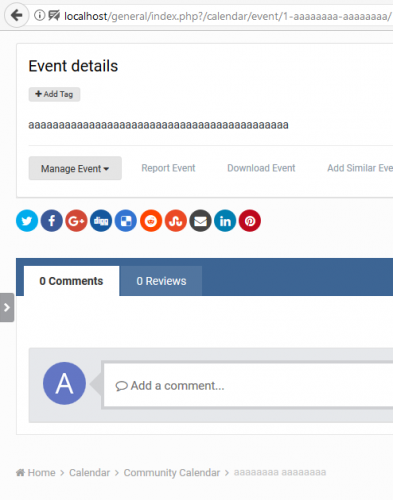
About This File Will swap REVIEWS and COMMENTS tab positions in event view. -
Version 1.0.0
46 downloads
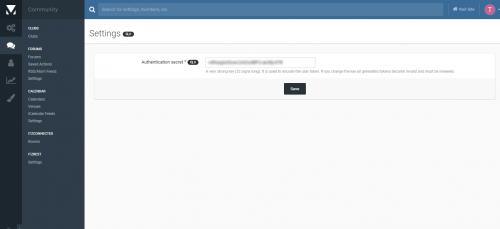
About This File For one of my projects I needed the possibility to read data from my board. I could not use the built in API because one important thing still is missing: user authentication and only get data the user is allowed to read. So I wrote my own REST API, including user authentication with tokens and a fluent data output. Currently it is not possible to write data. But the plan is to implement that feature in the future. The plugin is currently in a beta state and available for free. In the future there a plans that you have to purchase it. Installation Install the application through uploading it in the ACP Navigate to "Community" > "Itzrest" > "Settings" and insert a random 32 length key. This step is only needed if you want to use authorized access to the API. The key will be used to encode user tokens and authenticate the user if you make API calls. Make sure your webserver supports authentication headers. Otherwise authorized access will not work. That's it. Everything should work like a charme right now. Go on with the next topics Implemented endpoints Currently the following endpoints are implemented (more will be available in the future). And again: at the moment it is only possible to read data. You must prefix every endpoint with /restapi". Forums /forums /forums/<forumId> /forums/<forumId>/topics /forums/posts /forums/posts/<postId> /forums/topics /forums/topics/<topicId> /forums/topics/<topicId>/posts Core /discover/unread /discover /reactions /reactions/<reactionId> /staff/users /staff/users/<userId> /staff/groups /staff/groups/<groupId> /messenger/folders /messenger/folders/<folderId> /messenger/folders/<folderId>/conversations /messenger/conversations /messenger/conversations/<conversationId> /messenger/conversations/<conversationId>/messages /messenger/messages /messenger/messages/<messageId> Calendar /calendars /calendars/<calendarId> /calendars/<calendarId>/comments /calendars/<calendarId>/events /calendars/comments /calendars/comments/<commentId> /calendars/events /calendars/events/<eventId> /calendars/events/<eventId>/reviews /calendars/events/<eventId>/comments /calendars/reviews /calendars/reviews/<reviewId> Gallery /gallery/albums /gallery/albums/<albumId> /gallery/albums/<albumId>/images /gallery/albums/<albumId>/comments /gallery/categories /gallery/categories/<categoryId> /gallery/categories/<categoryId>/images /gallery/categories/<categoryId>/albums /gallery/reviews /gallery/reviews/<reviewId> /gallery/comments /gallery/comments/<commentId> /gallery/images /gallery/images/<imageId> /gallery/images/<imageId>/comments Authentication /auth/login /auth/authenticate Login as user To login as a user you must send a POST Request to the /auth/login endpoint with your username and password: curl \ -d username=max\ -d password=secret\ -X POST <baseurl>/restapi/auth/login As result you will get an object with several user data and the most important thing: the access token: { "data": { "id": "1", "name": "max", "access_token": "********", "photoUrl": "", "birthday": "" } } Keep the token secret and use it for authorized API calls how described in the step "make authorized requests". If you use authentication it would be the best way if you use a secure (https) connection to make API calls. Make requests Nothing more than sending a GET request to a specific endpoint: curl <baseurl>/restapi/<endpoint> For example: If you want to have all available calendars from your board: curl POST <baseurl>/restapi/calendars Your result will be something like that: { "data": [ { "id": "1", "title": "Community Calendar", "title_seo": "community-calendar", "color": "#6E4F99" } ] } Make authorized requests For authorized requests you need an access token. Append the access token as authorization header and make your request: curl \ -H "Authorization: Bearer <token>" \ -X <baseurl>/restapi/forums You can validate if your token is valid by sending a request to the /auth/authenticate endpoint: curl \ -H "Authorization: Bearer <token>" \ -X POST <baseurl>/restapi/auth/authenticate As result you should get a valid user object. Pagination, order If your board has thounsands of posts or threads we must paginate the results. Otherwise the performance of your requests will be horrible. Each endpoint accepts query parameters to sort and paginate your results in an easy way. Therefore each endpoint has a meta node in its result whicht give you information about your current agination state: "meta": { "pagination": { "total": "22", "count": "22", "per_page": "25", "current_page": "1", "total_pages": "1", "links": [] } } Now let us filter / paginate and limit our results: curl <baseurl>/restapi/forums/2/topics?order=title&orderDirection=asc&limit=5&page=2 We will get the following meta output: "meta": { "pagination": { "total": "22", "count": "5", "per_page": "5", "current_page": "2", "total_pages": "5", "links": { "previous": "<baseurl>/restapi/forums/2/topics/?page=1&order=title&orderDirection=asc&limit=5", "next": "<baseurl>/restapi/forums/2/topics/?page=3&order=title&orderDirection=asc&limit=5" } } }- 1 review
-
- 1
-

-
yes if you want your other members colored dont be scared to use them they are from here
-
what is this for it dont make any sence
-
admin group thats how you do it if you want rainbow for the others than you can add this globe theme just below the </body> <script> var speed=80 var hex=new Array("00","14","28","3C","50","64","78","8C","A0","B4","C8","DC","F0") var r=1 var g=1 var b=1 var seq=1 function changetext(){ for(i=0;i<document.getElementsByName("Rainbow").length;i++){ var storetext=document.getElementById? document.getElementsByName("Rainbow")[i] : document.all.highlight rainbow="#"+hex[r]+hex[g]+hex[b] storetext.style.color=rainbow } } function change(){ if (seq==6){ b-- if (b==0) seq=1 } if (seq==5){ r++ if (r==12) seq=6 } if (seq==4){ g-- if (g==0) seq=5 } if (seq==3){ b++ if (b==12) seq=4 } if (seq==2){ r-- if (r==0) seq=3 } if (seq==1){ g++ if (g==12) seq=2 } changetext() } <span style='color:#ff0000;font-weight:bold;'><span name="Rainbow">
-
it has its on sitemap just add to google
-
how to add the Facebook Comments Plugin Code Generator in the url put your https//websitename.com when they comment on your forum they can login as Facebook you can use this for guest to see if you are really getting visits to add it to your forums just below the comment section it will show up on all your topics goto you theme and look for forums topic and paste just under <div class='ipsResponsive_noFloat ipsResponsive_showPhone ipsResponsive_block ipsSpacer_top'> {template="promote" app="core" group="global" params="$topic"} </div> {{endif}}
-
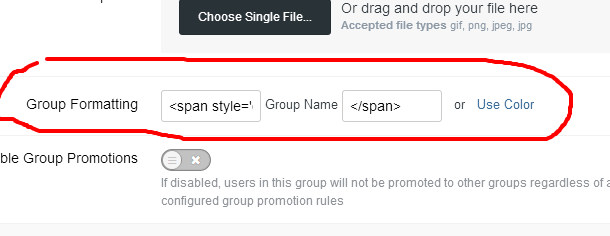
here is the codes for this to work find something you like and upload with ftp than you will need to add to your group admin <span style="background: url(https://www.website/Image/a.gif); color: #55d820; font-weight: bold; text-shadow: 0 0 .9em #ffffff;"Baddog-11</span>
-
Forum bar and Start New Topic
mr-pimpen replied to Quotolo's question in Invision Answered Questions
go to your theme and go to forums index and remove this <a class="ipsButton ipsButton_medium ipsButton_important" href="{url="app=forums&module=forums&controller=forums&do=add" seoTemplate="topic_non_forum_add_button"}" data-ipsDialog data-ipsDialog-size='narrow' data-ipsDialog-title='{lang="select_forum"}'>{lang="start_new_topic"}</a> <h1 class='ipsType_pageTitle'> {lang="forums"} </h1> -
your theme look for sideblock
-
admin cp theme breadcrum
-
i only speak english sorry and yes it works on all ips


.thumb.png.f2394b3de2e253ecece31461db0d27d9.png)