
Advertisement
Leaderboard

.jpg.b8711f3c73263c98ae402a9143171112.thumb.jpg.dabbe49db6097a40d0d0f66f4dfd7d31.jpg)

Popular Content
Showing content with the highest reputation on 11/10/2015 in all areas
-
In your Style CSS -> Brave -> ipb_styles ( or somerhing like that)1 point
-
is a plugin too search in download => online indicator1 point
-
I meant access to your forum via PM. Something then appears to be operating the linking. I tried it on my test board and it worked. Or meant this here??
 1 point
 -
Why so pessimistic ?? Have it tested on the test board and worked Let's wait and see if the setting works, we continue ... yet he has no feedback1 point
-
1. Via FTP you need you create a folder icon 2. Template "active users" enter the following <ul class='ipsList_inline ipsList_csv ipsList_noSpacing'> {{if \IPS\Member::loggedIn()->canAccessModule( \IPS\Application\Module::get( 'core', 'members' ) ) }} {{foreach $members as $row}} <img src="http://yourDomain/yourIconFolder/images.gif" alt="" itemprop="image"> <li> <a href="{url="app=core&module=members&controller=profile&id={$row['member_id']}" seoTemplate="profile" seoTitle="$row['seo_name']"}" data-ipsHover data-ipsHover-target='{url="app=core&module=members&controller=profile&id={$row['member_id']}&do=hovercard" seoTemplate="profile" seoTitle="$row['seo_name']"}' title="{lang="view_user_profile" sprintf="$row['member_name']"}">{expression="\IPS\Member\Group::load( $row['member_group'] )->formatName( $row['member_name'] )" raw="true"}</a> </li>See the Line <img src="http://yourDomain/yourIconFolder/images.gif" alt="" itemprop="image"> <li>3. Done1 point
-
its a setting that in the shoutbox settings however its activated by default if the skin u are using is brave or similar it wont work i tried everything i knew to get it on that skin and it never showed up, to test if what im saying is true simply switch to the default ipboard skin and if the @ is present then its probably the skin itself1 point
-
1 point
-
[data-dropdown] ul, [data-box], [data-dombox], [data-store], [data-domballoon], [data-balloon] { display: inline-block; }If you like Color .at_member { color: #FF0202; }And for your Shoutbox Servertime Background ( if you want / like ) #shoutbox-announcement-text { background: rgb(37, 37, 37) url("http://yourdomain/public/style_images/brave/_custom/bg-maintitle.png") repeat-x scroll center center / 100% 100%; } #shoutbox-announcement-row { background: rgb(33, 33, 33) none repeat scroll 0% 0%; } .message { border: transparent; }1 point
-
This guide/tutorial will serve as a way for current/future Site Administrators from all over the internet that use IP.Board as their choice of software to use to earn a little bit more money. Please note that I only intent to help users who are willing to use this guide and place advertisements on their Forums. First, to get start, visit http://www.google.com/adsense/start/ [ Warning: This is an External Link] After visiting the link provided above, you must sign in, using an existing Google Account (Gmail). If you do not have a Google Account, you will have to take the time to create one. Once you have signed in, please take the time to click Save Password. Depending on what browser you are using, different messages will appear wanting you to save your password. Internet Explorer will be located at the bottom of the page and Google Chrome will be located at the right-top corner of the browser. After you have signed in, visit the link once again. This time you will be able to officially start the process of getting your Advertisements. Locate and click on the Get Started Now button. Once you have click the button, you will be redirected to a new page. Here you must fill out the Application Process. After everything has been submitted to Google, you will be able to access to view how many view you have, what ads you have, and how many page views you have. Unfortunately, you will not have any page views as you have just recently made your Adsense account. At the top of the page, you will see a notification that states that your application has been submitted and is awaiting approval. You complete the Application Process, you must create ads and put them onto your Forums. To create ads, locate and click on "My Ads". Here is will display what ads you currently have. Unfortunately, you will not have any ads has you have recently made your account with Adsense. Find New Ad Unit and click on it to create a new ad. You will be asked to give the Name of the new Ad Unit, what dimensions you want the ad to be, and what the ad type is. Once you have filled out all this information, click on Save and Get Code. You will be supplied a code that you must implement into your Forums. Please take the time to log into your Admin Control Panel on your Forums. http://yoursite.com/admin/index.php [ Used as an Example] Once you have logged into your Admin Control Panel, locate Look & Feel. Find the name of your current skin that is being used on your Forums. Click on your current skin. A large variety of Templates will display and you are able to edit the Forums in any way you choose. Click on Board Index, which is located below Global Templates. A larger variety of templates will be displayed. Click on boardindexTemplate. On the first line, before: <if test="$this->settings['hoverDescriptions']='no'"></if> Add the code supplied to you by Google Adsense. Once you have added it, you have the choice to center the Ad on at the top of the page. To center the Ad, use: <center> CODE HERE </center> You can scroll down to the bottom of boardindexTemplate to add the code to the bottom of your index page. Please use the last couple steps to have you. Once both codes have been added, you can click on Save, that is located at the top of the Templates. Make sure to look at your Forums. You will notice that large sections are empty and no ads appear. They will appear empty until Google Adsense has approved your application.1 point
-
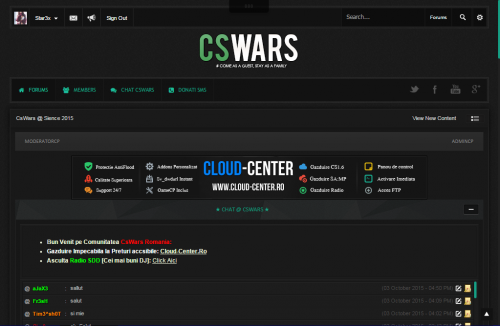
Version 1.0.1
560 downloads
V-am pus la dispozitie noul skin al comunitati www.CsWars.Ro Cand voi mai face teme o sa le postez aici.1 point -
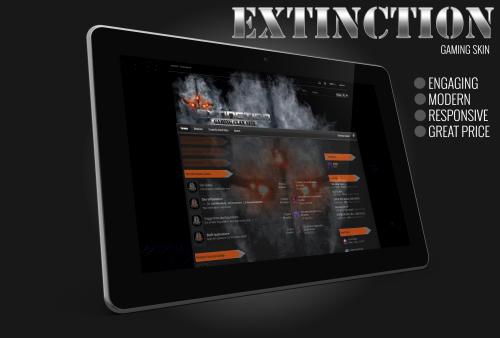
Version 1.1.0
205 downloads
Gaming clan skin themed with the upcoming call of duty ghosts game in mind ,easily customisable with logo psd featured in the download package.Responsive and clean design.install like any other skin.1 point -
Version 1.0.0
605 downloads
Aktolia it's a very interesting skin which is perfect to community about... everything. Why? Because included slider allows you to diametrically change of your page. In addition to that the proffesional design and included modyfications such as: new topic view or generate topic icon system make, that your webpage will be very unique. Check on live (demo)1 point -
1 point
-
I haven't found a tutorial for this anywhere online. And since I did this to my board using anonym.to custom code to implement it, i thought I would share it with the community. Go to AdminCP>Look & Feel>Your Default Skin>Manage Templates & CSS Edit the globalTemplate Find: </body>Add Before: <script src="http://js.anonym.to/anonym/anonymize.js" type="text/javascript"></script><script type="text/javascript"><!--protected_links = "yoursite.com";auto_anonymize();//--></script>Edit yoursite.com with your site. Example: <script src="http://js.anonym.to/anonym/anonymize.js" type="text/javascript"></script><script type="text/javascript"><!--protected_links = "webflake.net";auto_anonymize();//--></script>And all URLS/Links will be anonymized with anonym.to before the link, all links but webflake.net. You need to change webflake.net, to your site.1 point


This leaderboard is set to New York/GMT-05:00