
Advertisement
Leaderboard


Popular Content
Showing content with the highest reputation on 11/15/2019 in all areas
-
First you need to have Pages Second, you need to know how to "copy & paste" stuff Okay, so here are the steps in order - with no Categories... Going to make a database, field, and page while im writing this guide so if i forgot anything, just add it STEP 1: Go to the application Pages then click on Databases, click on + Create New STEP 2: Then a popup will...pop up just click "Next".. Now, you got a new page with 5 tabs on top: Details, Language, Options, Forums & Page Details: Name: choose the name you want, Bug Tracker, Support? Description: add what ever you want here Use Categories: If you want 100% as IPS4, select, and click on the radio button: "No, store records in the database directly"- if you want to use categories, do not edit this, let it be: Yes, allow records to be stored in different categories - chose the options you want if you chose no categories. Database Index: Select "Show categories" jump over the 4 next template stuff Template key: use either: support, bugs, bug, i use help Language: IF you want to use this as a support database, i recommend you to use: support, or bug report as Language, but it is all up to you Options: Wiki style: No - do not edit Edit own records indefinitely: Do not edit Store revisions: Yes, do not edit Allow searching: if you want, let it be, if not, set it on no Update the last action: Do not edit, if you want to edit it to your own do it But normal are: When a new comment is made only Moderate new records: no, do not edit Allow Comments: Yes, do not edit Moderate new comments: No, do not edit Allow Reviews: This is all up to how you want it, but i have it on: No, because i don't believe a review would benefit in a support tracker Tags: up to you, i do not use this Field Options: - Sort: Record ID? Or you can choose between the ones who are listed, up to you how you want to list the records. - Order: If you want the last post to show on top, use: descending 9-0 - records per page: Up to you Enable record image upload: this is like attachments, up to you Forums: If you want to add the support bugs in a forum, feel free to do so Pages: Database page: LOOK STEP 6 Click SAVE at the bottom STEP 3: Chose the Permission: to your desire and click save, now, you need to go somewhere else STEP 4: Below the database you just made there are a few options, one of them are Fields. click on it STEP 5: A new page has come up, now click on + Create New Here are 2 tabs you need to edit, General Options & Display Options, we going to manage general options first: General Options Title: Status Description: leave description alone Type: use the list and find: Select Box, use this Default Value: Add lower case the first key you have: pending. Content: here are 2 fields you need to fill out, click on "Add Another" 2 more times to add in total: 6 fields Key: pending Value: Pending Key: fixed Value: Fixed Key: closed Value: Closed And on Settings below, only add: Field Required and Allow Filtering Click on Display Options: template key: status Show in listing template: YES Listing View format: Select Custom A field, or 2 have been added below, add this code to the box(es) {{if ($value=='Pending')}} <span class="ipsBadge ipsBadge_style3 ipsPos_right">Pending</span> {{elseif ($value=='Fixed')}} <span class="ipsBadge ipsBadge_style4 ipsPos_right">Fixed</span> {{elseif ($value=='Closed')}} <span class="ipsBadge ipsBadge_style6 ipsPos_right">Closed</span> {{endif}} Show in display template: Yes and do the same here as you did above select: custom, add the code in the box below. Editable when viewing a record: Set this to "yes" And click: Save! STEP 6: Now the Page steps. Ok, go to Pages -> Pages -> Add Page -> Select: Page Builder: Name: you want to make a new page for this: name it bugs/bugtracker, bureports or your own name page filename: bugtracker? Theme: Default Theme Template: Single Column Then add the meta and stuff you want If you want to add the page to menu, do that to Oke, select permission, and then click on SAVE STEP 7: Go to pages again, and click on Page Builder - the little grey box on the left side, in the middle Okay, so the page went up, now you are seeing the awesome page you just made, so, on the LEFT side you the Block Manager, oke, so go to: Pages -> DRAG the "Database" out on the "mid field", or the top field. Click now on: EDIT - Select the database you made and, click "Finish Editing on the left side menu: block manager, at the bottom. And you are ready to go to report sum bugz, happy bugin' STEP 1: How to make the Status destriptions Okay, so, go to the support page you just made, click on this: so the block manager pops up on the left Go on Pages, and drag: WYSIWYG Editor to the sidebar, and EDIT, add this code: <p><strong>Status Definitions</strong></p><p><span class="ipsBadge ipsBadge_style5">Pending</span> = We are still working on this report.</p><p><span class="ipsBadge ipsBadge_style4">Fixed</span> = The issue has been fixed and the resolution will be available in the next version.</p><p><span class="ipsBadge ipsBadge_style6">Closed</span> = Feedback or opinion better posted on our forum for discussion. Also for reports we cannot reproduce or need more information. In this case just add a comment and we will review it again.</p> and click on, Save, and then click on: Finish Editing1 point
-
try this one [data-forumid="2"] .fa-comments:before { color: red; content: "\f0a1"; } and for your subforums you can do something like this .ipsDataItem_subList > li > a:before { font-family: 'FontAwesome'; display: inline-block; -webkit-font-smoothing: antialiased; -moz-osx-font-smoothing: grayscale; margin-right: 3px; opacity: 0.8; line-height: 1; border-radius: 2px; color: #fff; font-size: 11px; padding: 4px 7px; } /* Administrator (Open) */ [data-forumid="3"] .ipsDataItem_subList > li:nth-child(1) a:before { content: "\f09c"; background-color: #68a72f; } /* Moderator (close) */ [data-forumid="3"] .ipsDataItem_subList > li:nth-child(2) a:before { content: "\f023"; background-color: #e14242; } /* Grafik (close) */ [data-forumid="2"] .ipsDataItem_subList > li:nth-child(3) a:before { content: "\f023"; background-color: #e14242; }1 point
-

Version 1.0.7
200 downloads
Advanced footer allows you to add a footer to your site with as many blocks as you want, including feeds from Forums, Gallery, Downloads, Pages, Facebook page feed, Twitter timeline feed, Adding members block, Custom Editor/HTML blocks and more. Beautiful and clean design it is fully responsive and perfectly suits your theme due to its highly customizable options, it is entirely customizable, resizable, and reorderable. Features Custom blocks. Custom HTML/Editor blocks. Member blocks. Quick Links. Social blocks ( Facebook page feed, Twitter timeline feed, Social links ) Feed from IPS applications. ( New ) Forums. Gallery. Downloads. Pages. Create columns and optionally show it to specific themes, you can also set a custom column background color. ( New ) Create blocks and optionally set a specific width or a custom background color. ( New ) Resizable and reorderable Columns/blocks. Custom color options. / or Match colors to your theme.1 point -
Hi, I have an error. Seems like the block manager is not working, I can't drag blocks instead of that text gets selected, I updated from 4.3.6 to 4.4.31 point
-
Version 1.0.0
79 downloads
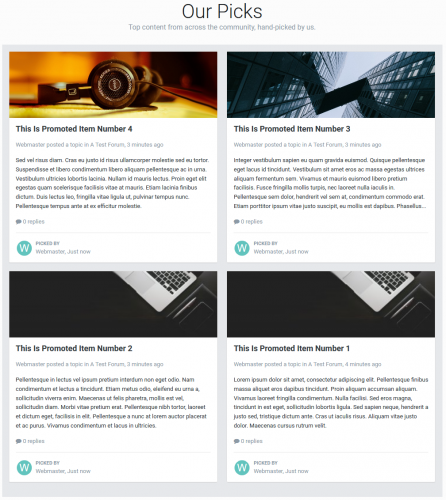
Our Pick Enhancements This is a small plugin to enhance some features of the core Our Picks page. I have always felt that the default Our Pick's Page was a little disorganised and all over the place. This little plugin will change the default look to look a bit more appealing and organised. There are 4 settings to help with this: Header default Image: Select a default image for promoted items which do do have an image. Header Background colour: Change the background color if you do not want to display a background image. Display Extra info: Enable or disable showing the 'Picked By' author and date, Cover Picks Columns: Select the number of columns per row for each item.1 point -
Version 1.0.0
199 downloads
The plugin is built on the basis of Online Indicator 1.1 + Advanced Online Indicator The Online Indicator plugin places an indicator next to the user names in messages and private messages. You can specify the Font Awesome icon for both statuses, online and offline. The avatar indicator has many settings for placement, color, etc. Also supported are round avatars. The addition of the Advanced Online Indicator allows you to determine the type of device from which the user entered and display it in addition to the online indicator in the form of an additional icon and text. There have been some minor improvements in the settings (adding a setting with which you can switch between normal and Advanced mode), the plugin already has a built-in css block, so you do not need to edit custom.css separately, also the font size and icon layout settings 1.1 apply to Advanced icons. The multilingual version supports the translation of output messages (PC, Phone, Tablet) ATTENTION! Version 1.1 is fully compatible with 4.2.x and is not compatible with engine versions lower than 4.1.19. Before installing, you must remove all previous versions of Online Indicator and also Advanced Online Indicator, and clean the cache1 point -
There have been a lot of questions about custom designs on our website and rather than repeating ourselves over and over, we're pinning this topic as a reminder. We simply do NOT provide any support for questions about customization on WebFlake. These designs are made to help make WebFlake unique. An example would be questions about our Feature Plan, which has been created by @ Tony. If Tony chooses to release a paid version or a tutorial, then you can use that but until then we're not going to provide support on how to replicate it. We also won't tell you how to copy our theme, that's just silly. This does not mean that you cannot request support for files that are available to download for free. You are always welcome to open a support topic if you have an issue or a question about a file found in our downloads system. If you are not sure whether your question is acceptable, please send a message to one of our Staff members to be sure. Please remember that we do not offer support though private messages.1 point


.thumb.png.267184132e48b991c16493df416343ce.png)


This leaderboard is set to New York/GMT-05:00