Advertisement


Music Case
-
Posts
57 -
Joined
-
Last visited
-
Days Won
1
Content Type
Profiles
Forums
Downloads
Bugs
WF Feature Plan
Suggestions
WebFlake Release Notes
FAQ
Store
Blogs
Applications
Ideas
Everything posted by Music Case
-
Depends, videos ? Youtube so much more content and people are just more active on there... Live streaming ? Then i'd pick twitch it's more streamer friendly and i just prefer the UI of it all....
-
Yeah that's correct however you'll get the error "Could not save block location" nor will it have any styling as that template for a params="xxxx" doesn't exist yet.
-

Internal embeds not working
Music Case replied to Music Case's question in Invision Answered Questions
Cool thanks for clarifying depending on price I’ll probably purchase it when I get paid. Thanks! -
Internal embeds not working
Music Case replied to Music Case's question in Invision Answered Questions
The version on my profile is incorrect, I use 4.2.5, in fact I’ll change it now -
Internal embeds not working
Music Case replied to Music Case's question in Invision Answered Questions
@Lady C I originally thought this was the case and due to me not knowing too much on how the themes work, I can only rely on information provided here. The theme was downloaded from the 4.2 section however judging by the comments which I’ve now read it seems to be the case of old theme. -
Internal embeds not working
Music Case replied to Music Case's question in Invision Answered Questions
Yeah all my settings are allowing embeds, the embed works on other themes just not this one, i was wondering if i'm missing a theme template or something ? -
Hello, I'm currently having a theme related issue with embeds, whenever i go to embed something it just shows as a mobile version iframe: However it only does it on this one theme, on the default IPS theme it embeds correctly and on any other installed theme it also embeds correctly. Any ideas ? Thanks!

-
this is an exact copy of the code i use just edited for your purpose: {{if (isset( \IPS\Output::i()->sidebar['enabled'] ) and \IPS\Output::i()->sidebar['enabled'] ) && ( ( isset( \IPS\Output::i()->sidebar['contextual'] ) && trim( \IPS\Output::i()->sidebar['contextual'] ) !== '' ) || ( isset( \IPS\Output::i()->sidebar['widgets']['sidebar_two'] ) && count( \IPS\Output::i()->sidebar['widgets']['sidebar_two'] ) ) || ( \IPS\Dispatcher::i()->application instanceof \IPS\Application AND \IPS\Dispatcher::i()->application->canManageWidgets() ) )}} <div id='ipsLayout_sidebar_two' class='ipsSidebar_two ipsLayout_sidebar_two{$position} {{if !( isset( \IPS\Output::i()->sidebar['contextual'] ) && trim( \IPS\Output::i()->sidebar['contextual'] ) !== '' ) && ( !isset( \IPS\Output::i()->sidebar['widgets']['sidebar_two'] ) || !count( \IPS\Output::i()->sidebar['widgets']['sidebar_two'] ) ) && \IPS\Dispatcher::i()->application->canManageWidgets()}}ipsLayout_sidebarUnused{{endif}}' data-controller='core.front.widgets.sidebar_two'> {{if isset( \IPS\Output::i()->sidebar['contextual'] ) && trim( \IPS\Output::i()->sidebar['contextual'] ) !== ''}} <aside id="elContextualTools" class='ipsClearfix' {{if isset( \IPS\Output::i()->sidebar['sticky'] )}}data-ipsSticky{{endif}}> {expression="\IPS\Output::i()->sidebar['contextual']" raw="true"} </aside> {{endif}} {{if isset(\IPS\Output::i()->sidebar['widgets']['sidebar_two']) and count( \IPS\Output::i()->sidebar['widgets']['sidebar_two'] ) and ( \IPS\core\Advertisement::loadByLocation( 'ad_sidebar' ) ) }} {advertisement="ad_sidebar"} <br><br> {{endif}} {template="widgetContainer" group="global" app="core" params="'sidebar_two', 'vertical'"} </div> {{endif}} if you're needing any help just lemme know you're more than welcome to pop up in PM!
-
Sorry bro been away from internet for a week or so I'll be home tomorrow evening and I'll be happy to help.
-
you dont have to remove anything in these lines, you just gotta add your new widget location's name.... for example on line 33: if ( ! \IPS\Member::loggedIn()->modPermission('can_manage_sidebar', 'can_manage_WIDGET NAME') in bold is the part you need to add, same for the other lines, obviously you need to change WIDGET NAME to whatever you called it in previous steps. PM me a if you want me to have a lil look at your site.
-
In the midst of adding images for the code as well as a demo board for people to add widgets to multiple new block locations! Hello, So I have spent a long time tinkering with IPS4 in order to have more than the default 3 widget locations. I've always urged for a portal more like the one from IPS3.X so iv'e found a way to add your own widget locations. This tutorial involved editing some important files and creating your own in the theme editor screen so it's a reasonably complex tutorial so i'd advise greatly to back your site up! So before you spend ages reading here's what this tutorial will show you how to do: Demo Prerequisites: Back up your website theme Back up your websites files and database Make a snapshot if possible (cPannel) Firstly: You need to go into your theme editor and edit some lines of your globalTemplate, I would advise copying the original code into a notepad just in case it goes wrong, but you should already of backed up your theme anyways. Around mid way down, depending on theme you'll find these the lines (they might be together or separated across a few lines): {template="widgetContainer" group="global" app="core" params="'header', 'horizontal'"} {template="widgetContainer" group="global" app="core" params="'footer', 'horizontal'"} {template="sidebar" if="theme.sidebar_position == 'right'" app="core" group="global" params="'right'"} Now you want to copy one or multiple of these lines depending on what you're trying to accomplish. For tutorial reason i'm going to add 2 sidebars, so copy: {template="sidebar" if="theme.sidebar_position == 'right'" app="core" group="global" params="'right'"} {template="sidebar_two" if="theme.sidebar_position == 'right'" app="core" group="global" params="'right'"} and paste it underneath the original and change the {template="sidebar"..... to {template="sidebar_two".... and now save your globalTemplate. Secondly: Now stay in the theme editor and add a new HTML template, name it sidebar_two or corresponding to what you named the new widget. Make sure the drop down menus are as follows: Location: Front Existing Group: Global Applications: System and now insert the "sidebar" template code into there and change are the sidebar tags as your widget name, in this case sidebar_two {{if (isset( \IPS\Output::i()->sidebar['enabled'] ) and \IPS\Output::i()->sidebar['enabled'] ) && ( ( isset( \IPS\Output::i()->sidebar['contextual'] ) && trim( \IPS\Output::i()->sidebar['contextual'] ) !== '' ) || ( isset( \IPS\Output::i()->sidebar['widgets']['sidebar'] ) && count( \IPS\Output::i()->sidebar['widgets']['sidebar'] ) ) || ( \IPS\Dispatcher::i()->application instanceof \IPS\Application AND \IPS\Dispatcher::i()->application->canManageWidgets() ) )}} <div id='ipsLayout_sidebar' class='ipsLayout_sidebar{$position} {{if !( isset( \IPS\Output::i()->sidebar['contextual'] ) && trim( \IPS\Output::i()->sidebar['contextual'] ) !== '' ) && ( !isset( \IPS\Output::i()->sidebar['widgets']['sidebar'] ) || !count( \IPS\Output::i()->sidebar['widgets']['sidebar'] ) ) && \IPS\Dispatcher::i()->application->canManageWidgets()}}ipsLayout_sidebarUnused{{endif}}' data-controller='core.front.widgets.sidebar'> {{if isset( \IPS\Output::i()->sidebar['contextual'] ) && trim( \IPS\Output::i()->sidebar['contextual'] ) !== ''}} <aside id="elContextualTools" class='ipsClearfix' {{if isset( \IPS\Output::i()->sidebar['sticky'] )}}data-ipsSticky{{endif}}> {expression="\IPS\Output::i()->sidebar['contextual']" raw="true"} </aside> {{endif}} {{if isset(\IPS\Output::i()->sidebar['widgets']['sidebar']) and count( \IPS\Output::i()->sidebar['widgets']['sidebar'] ) and ( \IPS\core\Advertisement::loadByLocation( 'ad_sidebar' ) ) }} {advertisement="ad_sidebar"} <br><br> {{endif}} {template="widgetContainer" group="global" app="core" params="'sidebar', 'vertical'"} </div> {{endif}} Thirdly: Now you need to edit a system file, which you can do on your desktop then overwrite the file or you can do on cPannel file explorer as i have cPannel i'll be doing it in there, I STRONGLY advise you back this file up, editing this file incorrectly will result in none of your widgets working! Navigate to: Applications >> Core >> Modules >> Front >> System >> and edit Widgets.php On these lines add your widget name: Line: 33 if ( ! \IPS\Member::loggedIn()->modPermission('can_manage_sidebar', 'can_manage_WIDGET NAME') Line 35: \IPS\Output::i()->error( 'no_permission_manage_sidebar', 'no_permission_manage_WIDGET NAME', '3S172/1', 403, '' ); Line 75: if ( ! $block->isExecutableByApp( array( \IPS\Request::i()->pageApp, 'sidebar', 'WIDGET NAME' ) ) ) Line 236: if( !in_array( \IPS\Request::i()->area, array( 'sidebar', 'WIDGET NAME' , 'header', 'footer' ) ) ) once you have made those changes save the widgets.php and overwrite the file. Now when you go back to your home page and try to insert blocks into the new widgets it should work without any errors and save the locations! Finally: This is hugely variable between widgets youv'e chosen and widget locations. However you can move the original: {template="sidebar_two" if="theme.sidebar_position == 'right'" app="core" group="global" params="'right'"} To wherever you want the widget to be on your site, you may need to also do some CSS edits. BUGS: So because default IPS only have 3 blocks 1 is which is sidebar, in your theme settings it will ask where you want your sidebar (left or right) this is kinda of obsolete now as you can put it wherever you want. The blocks do mobile friendly rather well, however left blocks will appear on top of the side and right blocks will appear at the bottom.
-
Making your own block locations
Music Case replied to Music Case's question in Invision Answered Questions
I sussed it out, i'll be making a tutorial soons -
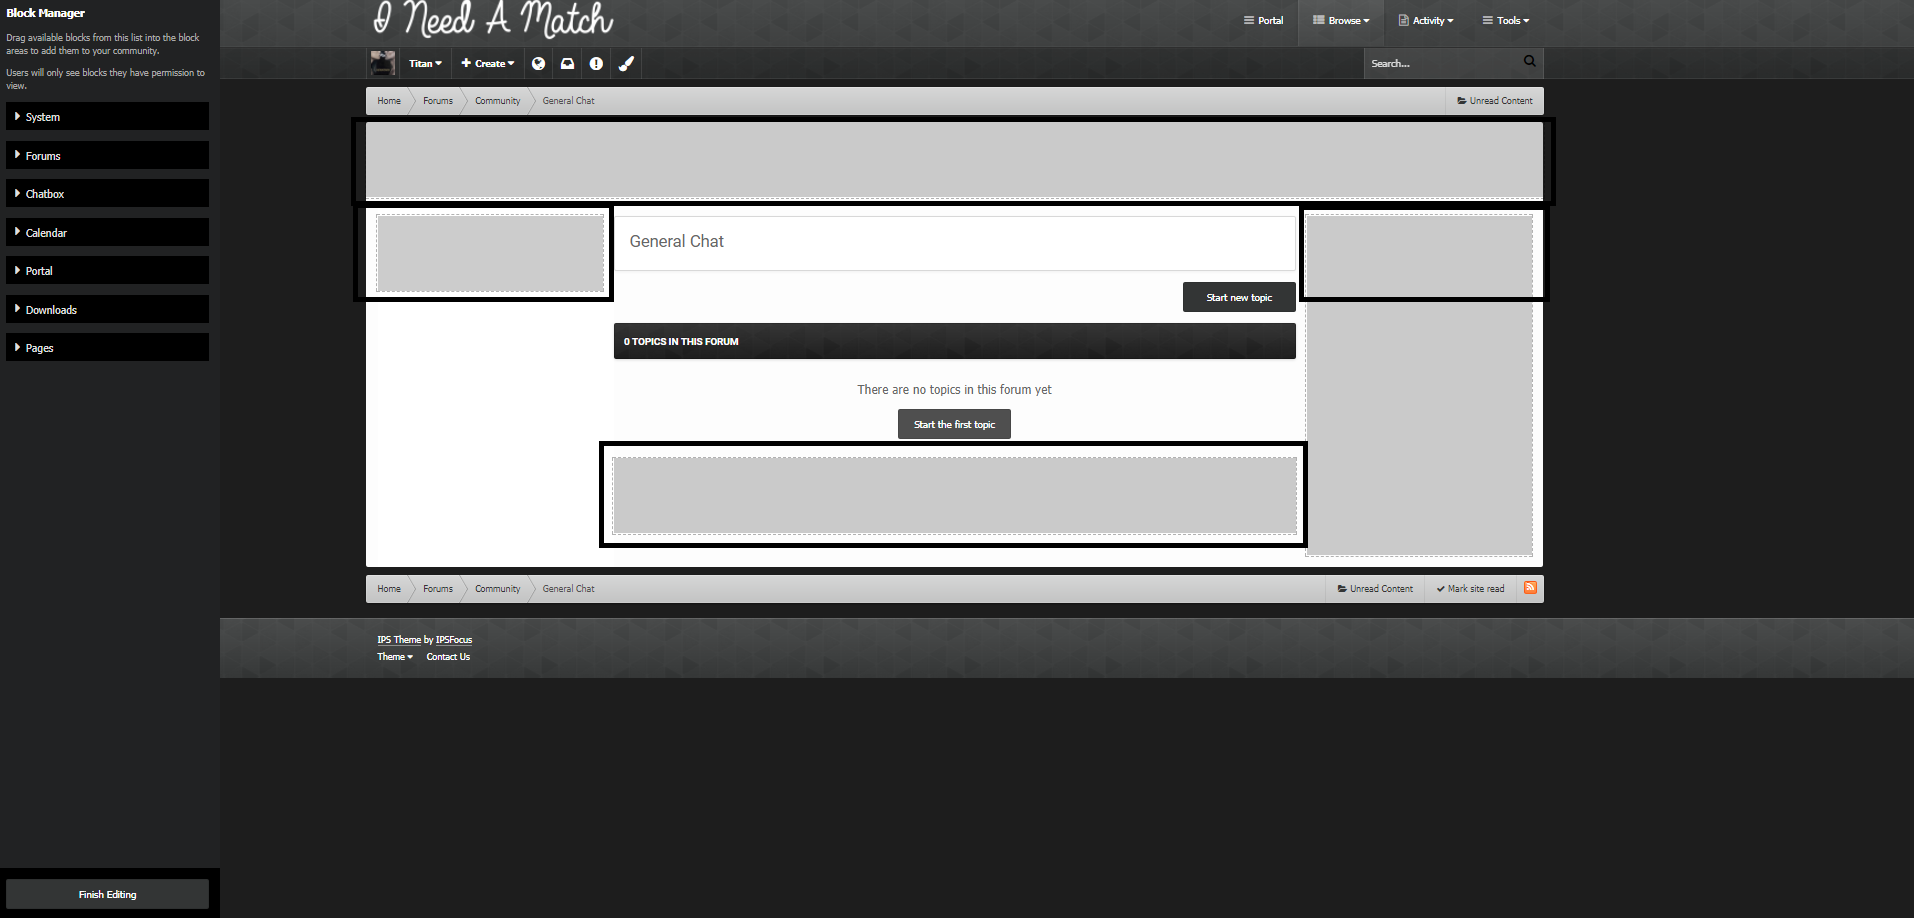
Hello, So iv'e noticed that IPS4.X is limited to 3 block locations: Header Side (Left OR Right not both) Footer Well i found i can create my own block locations, for example if i wanted Header Left Right Footer Some other location I can accomplish this by just simply copying {template="widgetContainer" group="global" app="core" params="'footer', 'horizontal'"} and changing it to {template="widgetContainer" group="global" app="core" params="'footer_two', 'horizontal'"} or whatever else, this accomplishes the new block location however it reports as block cannot be saved error on the site. My question is if anyone knows how to get around this or if there's some javascript in place to save block locations ? I feel it would be of great benifit if we could make our own block locations for portal for example to be more on part with 3.x. Thanks!
-
Formatting all wrong since upgrading to 4.1.17.1
Music Case replied to Little Monsters's question in Invision Answered Questions
All good dude, when ever there's an issue best thing to do is run the support tool, then work you way from there... happy to help! -
Formatting all wrong since upgrading to 4.1.17.1
Music Case replied to Little Monsters's question in Invision Answered Questions
I can only think of one thing that maybe the problem, which is if you're using a custom theme then it might not be up to date with IPS4 meaning it will look like there's no styling, ... A solution would be to log into ACP, find support and click "something is'nt working correctly" and run all the way through it so it disables your apps and restores the default theme, that should fix the issue however then your apps will be either outdated or completely incompatible in which case you need to enable them one at a time to see if they work and if they don't then keep them disabled until you find an IPS4 alternative or an updated version for IPS4. You would have to repeat this for the theme too, keeping it disabled until you remake your IPB3 theme IPS4 compatible or until you find an IPS4 theme. I don't know how you upgraded but you're meant to disable all applications etc and i don't know if this is necessary but i usually revert to default theme until iv'e finished the upgrade. Also because your ACP is also messed up, navigation maybe hard so if you can't find support then CTRL+F and search for support it should find it nice and easily for you. If you'd like I can help out if you don't mind me logging in but that's completely up to you PM me if you'd like. -
Hey people, just a quick guide to remove the "Portal by DevFuse · Based on IP.Board Portal by IPS" on the Portal page in Portal 1.6.0 by DevFuse. So firstly you need to download Portal 1.6.0 (This will probably work on all versions this is just the one i did it on) which is available here: Then you need to unzip the folder, and you should get Portal Install Readme Upgrade from IP.Board 3.X portal.tar So now you need to unzip portal.tar and you'll get a list of directories, you want to navigate to this one: modules front portal and now open portal.php in a text editor (i use notepadd++) and find this line which should be the 33 >> 35th line: { \IPS\Output::i()->output .= "<div style='clear:both;text-align:center;position:absolute;bottom:15px;width:95%;'><a href='http://www.devfuse.com/' class='ipsType_smaller ipsType_light'>Portal by DevFuse</a> · <a href='http://www.invisionpower.com/' class='ipsType_smaller ipsType_light'>Based on IP.Board Portal by IPS</a></div>"; } and remove the part between the " " { \IPS\Output::i()->output .= " "; } then save the .php file overwriting the original one, then go back to the portal directory. The file tree should look like this: data extensions hooks interface modules setup sources tasks widgets Application.php And use 7zip to zip them up into a .tar format then you can either update your existing Portal by uploading a new version via ACP or installing Portal from scratch using the same method you would usually install applications. Hope this helps some people!
-
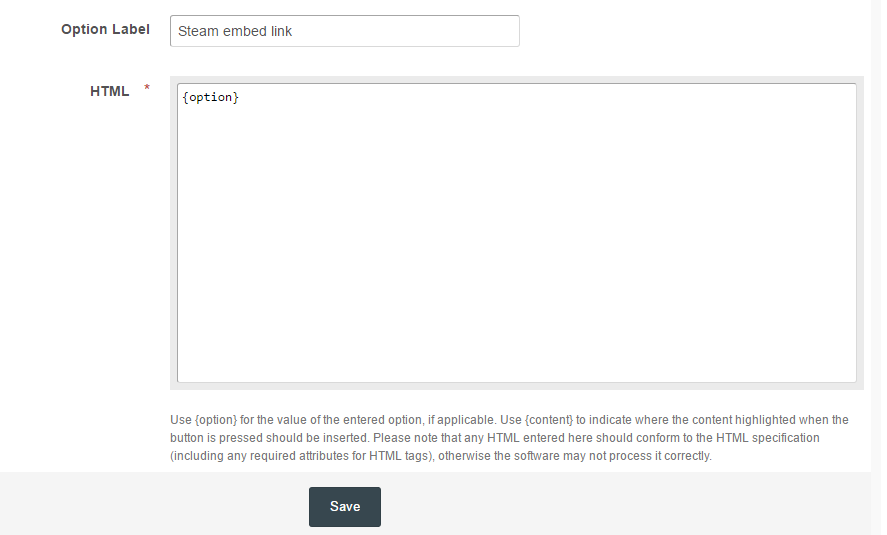
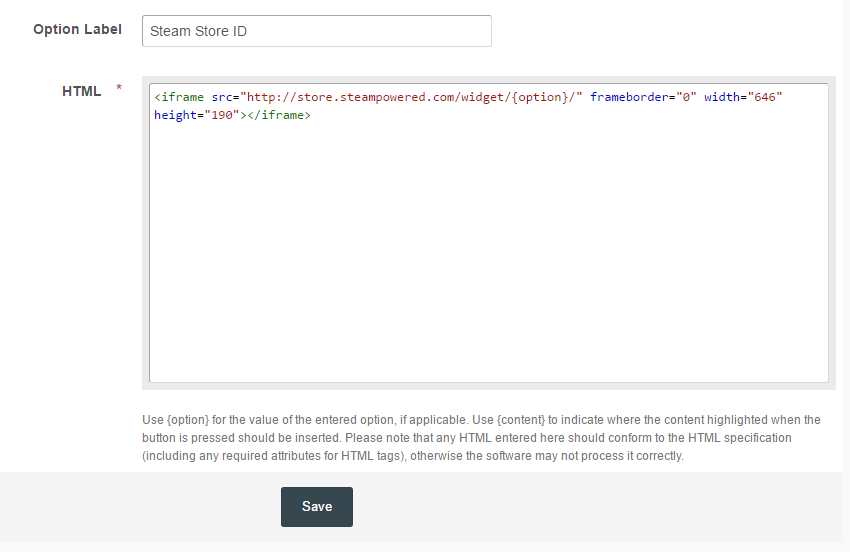
You could go about this multiple ways both include creating your own BBCode: Method One: making your own bbcode, allowing the {option} feature and just putting {option} in the required field like this, however this will leave you vulnerable to all sorts of malicious code as anyone could insert any code and put it in. Method Two: Making your own bbcode to be <iframe src="http://store.steampowered.com/widget/{option}/" frameborder="0" width="646" height="190"></iframe> where people can insert the ID of the steam store page and it will embed the steam store widget like that.
-
I read that a lil hostilely but i digress you're correct it's 'kinda' in the wrong area, after all it is coding but i didn't see there was a section specifically for IPS4 if the mod would like to move it then he may...
-
I could do I didn't want to over complicate it with things such as no-repeat background images, cover background images etc it's was essentially quickly for those asking however I could go more in depth in the background image, no repeat etc and groups. I'll add things as I work them out, with postbit been essentially an unlimited height thing, since it depends on post height, so i don't even know if no-repeat or cover would work but we'll soon see i'll add pictures too because everyone likes pictures. Thanks for the ideas.
-
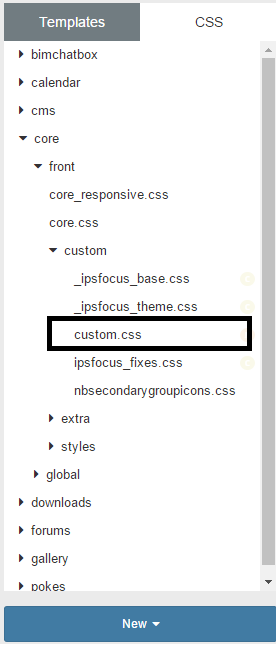
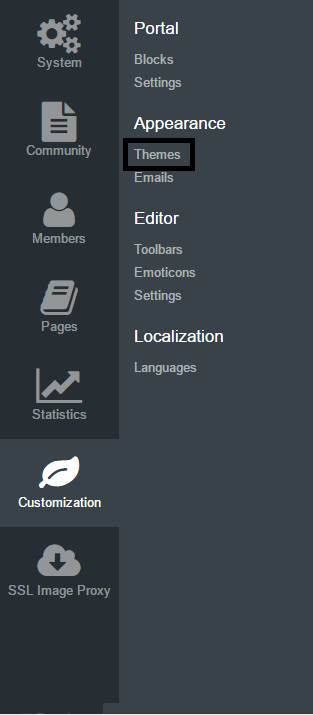
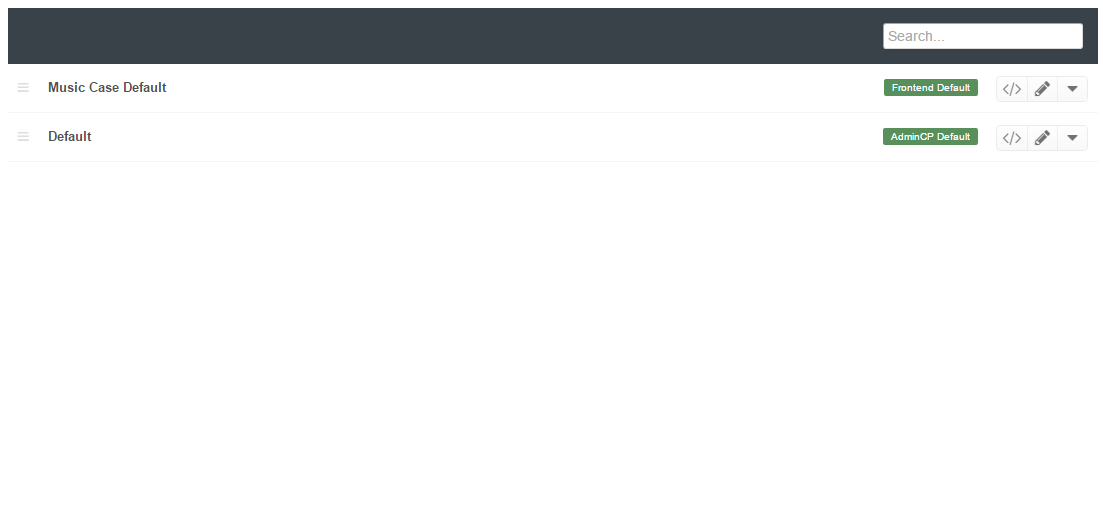
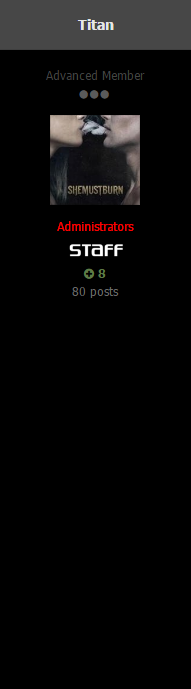
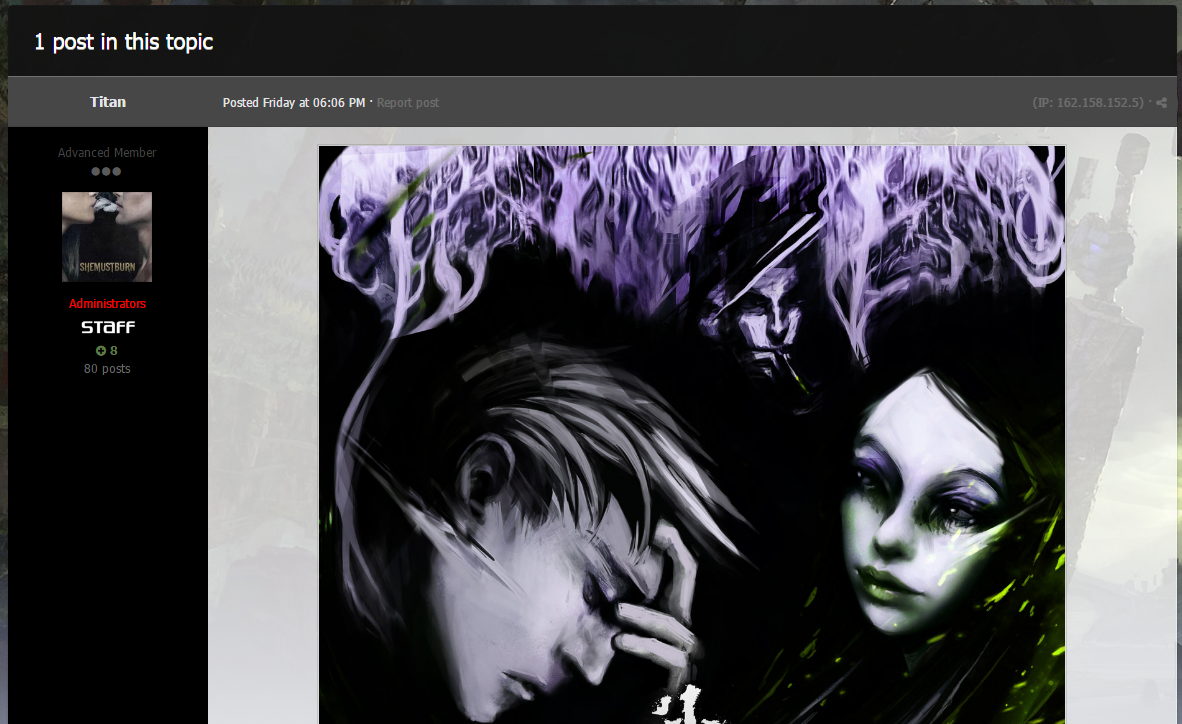
REGIGGING IF LOOKS WEIRD I'M EDITING IT -- I'm from UK and iv'e half finished updating this but i got to get some sleep // sort daughter's stuff out... i'll finish tomorrow -- Finish editing -- finding a way to make this group based -- any other ideas let me know ill edit // update as i go Hey a quick guide on how to add a background image or a background color to the Postbit in IPB4 as I have noticed a few people asking here on Webflake and other external nulling sites. This tutorial will go through the steps of adding custom styling to your custom.css, adding a background image (With things such as no-repeat and cover) as well as background color (Including a quick explanation of HTML // CSS colors) in the Postbit. Part One - Editing custom.css and where to find it. Part Two - Adding cutom color to the Postbit. (*1*) - Quick explanation on HTML // CSS colors (*2*) - Desktop (*3*) - Mobile Part Three - Adding Custom image to the Postbit. (*1*) - Quick explanation on background image HTML // CSS properties (*1*) - Desktop (*2*) - Mobile ______________________________________________________________________________________________________ Part One - Editing Custom.css To my knoweldge the custom.css is loaded last meaning any CSS edits you make to this file will be prioritized over anything else, this is useful because you don't have to go hoarding through pages and lines of code to find exactly what you want to edit this. You can find the custom.css file by going to: ACP >> Customization >> Themes >> Edit CSS and HTML (most left button) Click the CSS tab >> Scroll to custom >> Click on it As seen in these pictures: ______________________________________________________________________________________________________ Part Two - Adding Custom Color *1* Colors in HTML and CSS coming either HEX or RGBA, HEX are basic solid colors which is the '#' followed by a string of 6 numbers and/or letters, for example White is #FFFFFF and Black is #000000. RGBA stands for Red / Green / Blue / Alpha which are obviously the primary colors which when mixed can create any color. RGBA are a little more complex than HEX colors are the Alpha allows them to have transparency, an RGBA is laid out like this rgba(#,#,#, Opacity) so for example White is rgba(255,255,255) as all colors equal white, Black is rgba(0,0,0) as no color equal black, to add opacity you add a 4th number into the 'string' so for example Transparent White would be rgba(255,255,255, 0.5) to increase or decrease the opacity just simply increase or decrease the number between 0.1 and 0.9, this is the exact same for all colors. For more or to find your color you want go to W3Schools *2* To add a color to your Postbit in desktop view you want to add this code to your custom.css, which you can find by following above. You want to copy this exact code and add it into the custom.css, then you want to edit the 'COLOR' part with either a valid HEX or RGBA color. .cAuthorPane { background-color: COLOR; } This is an example with a color added, as a demo Black. .cAuthorPane { background-color: #000000; } And this is what it will look like: *3* As you may or may not have noticed this only affects the desktop view (view bigger than 920px in my case) and doesn't affect your mobile view, so to add the color to your mobile view you ALSO need to add the following code again replacing 'COLOR' with a valid HEX or RGBA color: @media screen and (max-width: 920px) .cPost.ipsComment .cAuthorPane { background-color: COLOR; } an example of the code would look like this, again i'm using Black for the example: @media screen and (max-width: 920px) .cPost.ipsComment .cAuthorPane { background-color: #000000; } Which would result in it look like this: (*2*) To add a background image you need to add the following INSTEAD of the above: .cAuthorPane { background-image: url(' IMAGE URL '); } Replacing the IMAGE URL with an actual image.It will either stretch the image to the post bit size or, repeat the image to the post bit size, so I would recommend using an image a lil bigger than the postbit. Hopefully this helped and others will find it so they don't have to keep asking, but if they do then at least people can link here right ?
-
Help with Navigation/Code Errors
Music Case replied to Envy's question in Invision Answered Questions
got a guest account bro ? The reason i ask is because i manually add the emoticon script to my site because my chatbox doesn't work without it, so maybe that will resolve your emoticon issue for you ?... here's the script if you want to test it, put it in your <head> tag in globalTemplate ACP >> customization >> theme >> edit html and css <!-- Emoticons --> <script type="text/javascript"> ips.setSetting( 'chatbox_conf_interval', 10000 ); ips.setSetting( 'chatbox_soundEnabled', ips.utils.db.get( 'chatbox', 'sounds' ) ); ips.setSetting( 'chatbox_topStyle', 0 ); ips.setSetting( 'chatbox_maxMSG', 100 ); ips.setSetting( 'chatbox_maxEmoticons', 5 ); ips.setSetting( 'chatbox_Emoticons', {">:(":"http:\/\/149.202.136.13\/uploads\/emoticons\/angry.png",":D":"http:\/\/149.202.136.13\/uploads\/emoticons\/biggrin.png","O.o":"http:\/\/149.202.136.13\/uploads\/emoticons\/blink.png",":$":"http:\/\/149.202.136.13\/uploads\/emoticons\/blush.png","B|":"http:\/\/149.202.136.13\/uploads\/emoticons\/cool.png","\u00ac\u00ac":"http:\/\/149.202.136.13\/uploads\/emoticons\/dry.png","^_^":"http:\/\/149.202.136.13\/uploads\/emoticons\/happy.png","o.O":"http:\/\/149.202.136.13\/uploads\/emoticons\/huh.png","xD":"http:\/\/149.202.136.13\/uploads\/emoticons\/laugh.png",":|":"http:\/\/149.202.136.13\/uploads\/emoticons\/mellow.png",":o":"http:\/\/149.202.136.13\/uploads\/emoticons\/ohmy.png",":ph34r:":"http:\/\/149.202.136.13\/uploads\/emoticons\/ph34r.png","9_9":"http:\/\/149.202.136.13\/uploads\/emoticons\/rolleyes.gif",":(":"http:\/\/149.202.136.13\/uploads\/emoticons\/sad.png","-_-":"http:\/\/149.202.136.13\/uploads\/emoticons\/sleep.png",":)":"http:\/\/149.202.136.13\/uploads\/emoticons\/smile.png",":P":"http:\/\/149.202.136.13\/uploads\/emoticons\/tongue.png",":\/":"http:\/\/149.202.136.13\/uploads\/emoticons\/unsure.png",":S":"http:\/\/149.202.136.13\/uploads\/emoticons\/wacko.png",";)":"http:\/\/149.202.136.13\/uploads\/emoticons\/wink.png",":x":"http:\/\/149.202.136.13\/uploads\/emoticons\/wub.png"} ); ips.setSetting( 'chatbox_imgPost', 1 ); ips.setSetting( 'chatbox_24h', false ); ips.setSetting( 'chatbox_getAll', false ); </script> <!-- End Emoticons --> -
Help with Navigation/Code Errors
Music Case replied to Envy's question in Invision Answered Questions
Nav bar menu items can be added // removed by going to: ACP >>System >>Menu Manager or do you mean visually (colors etc) edit your menu ? As for your other issues, not sure about either but if you wanna link to your board i can have a look... -
Automatic post when moving topics
Music Case replied to Crowl's question in Invision Answered Questions
This ? https://invisionpower.com/files/file/7796-automatic-post-when-moving-topic/ Download is here if it's the right thing, a quick look, looks like it is: -
or add this to your custom.css.. #elUserNav .ipsUserPhoto img { border-radius: 100%; } Tested on my board just now, also looks a lot nicer than the square thanks for the idea.. Edit Add this to make the ''hover'' circle too otherwise it'l just be square. #elUserNav a.ipsUserPhoto { border-radius: 100%; }
-
I need help converting vbulletin 4 to ipb 4+
Music Case replied to phillyian's question in Invision Answered Questions
Once converted into IPB3.X then just upgrade as you usually would upgrade IPB3 to IPS4 ? Edit I noticed you opened a thread asking how to do this i'll link to IPS4 upgrade tutorial on their website on here and your other thread so you see it. https://invisionpower.com/forums/topic/406362-upgrade-from-ip-34x-to-ips40/