
Advertisement
Leaderboard


Popular Content
Showing content with the highest reputation on 02/16/2019 in all areas
-

Version 4.3.6
13,359 downloads
IPS Community Suite 4.3.6 Released 9/20/2018 WebFlake Note: Please create a support topic if you need assistance. As always, we recommend that you backup your current installation (database included) before upgrading.2 points -
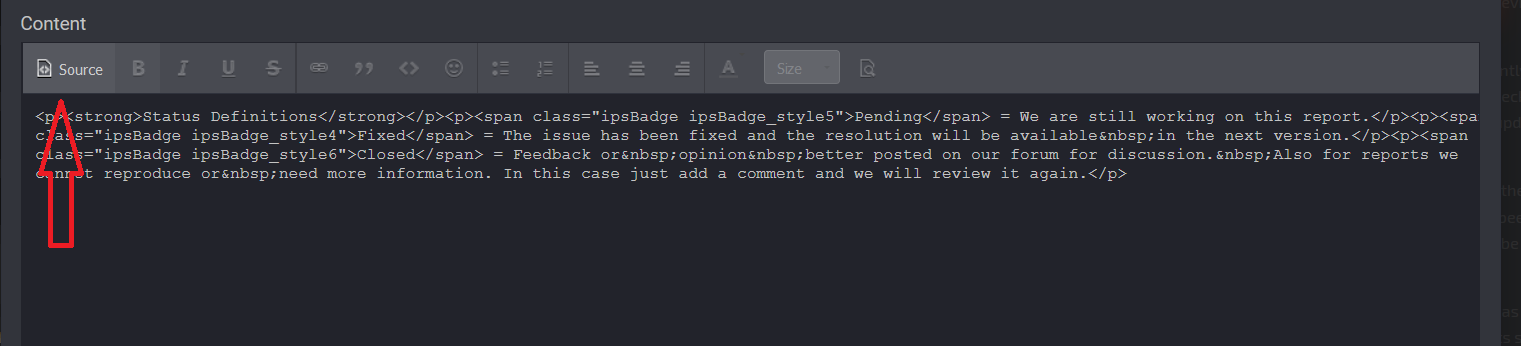
First you need to have Pages Second, you need to know how to "copy & paste" stuff Okay, so here are the steps in order - with no Categories... Going to make a database, field, and page while im writing this guide so if i forgot anything, just add it STEP 1: Go to the application Pages then click on Databases, click on + Create New STEP 2: Then a popup will...pop up just click "Next".. Now, you got a new page with 5 tabs on top: Details, Language, Options, Forums & Page Details: Name: choose the name you want, Bug Tracker, Support? Description: add what ever you want here Use Categories: If you want 100% as IPS4, select, and click on the radio button: "No, store records in the database directly"- if you want to use categories, do not edit this, let it be: Yes, allow records to be stored in different categories - chose the options you want if you chose no categories. Database Index: Select "Show categories" jump over the 4 next template stuff Template key: use either: support, bugs, bug, i use help Language: IF you want to use this as a support database, i recommend you to use: support, or bug report as Language, but it is all up to you Options: Wiki style: No - do not edit Edit own records indefinitely: Do not edit Store revisions: Yes, do not edit Allow searching: if you want, let it be, if not, set it on no Update the last action: Do not edit, if you want to edit it to your own do it But normal are: When a new comment is made only Moderate new records: no, do not edit Allow Comments: Yes, do not edit Moderate new comments: No, do not edit Allow Reviews: This is all up to how you want it, but i have it on: No, because i don't believe a review would benefit in a support tracker Tags: up to you, i do not use this Field Options: - Sort: Record ID? Or you can choose between the ones who are listed, up to you how you want to list the records. - Order: If you want the last post to show on top, use: descending 9-0 - records per page: Up to you Enable record image upload: this is like attachments, up to you Forums: If you want to add the support bugs in a forum, feel free to do so Pages: Database page: LOOK STEP 6 Click SAVE at the bottom STEP 3: Chose the Permission: to your desire and click save, now, you need to go somewhere else STEP 4: Below the database you just made there are a few options, one of them are Fields. click on it STEP 5: A new page has come up, now click on + Create New Here are 2 tabs you need to edit, General Options & Display Options, we going to manage general options first: General Options Title: Status Description: leave description alone Type: use the list and find: Select Box, use this Default Value: Add lower case the first key you have: pending. Content: here are 2 fields you need to fill out, click on "Add Another" 2 more times to add in total: 6 fields Key: pending Value: Pending Key: fixed Value: Fixed Key: closed Value: Closed And on Settings below, only add: Field Required and Allow Filtering Click on Display Options: template key: status Show in listing template: YES Listing View format: Select Custom A field, or 2 have been added below, add this code to the box(es) {{if ($value=='Pending')}} <span class="ipsBadge ipsBadge_style3 ipsPos_right">Pending</span> {{elseif ($value=='Fixed')}} <span class="ipsBadge ipsBadge_style4 ipsPos_right">Fixed</span> {{elseif ($value=='Closed')}} <span class="ipsBadge ipsBadge_style6 ipsPos_right">Closed</span> {{endif}} Show in display template: Yes and do the same here as you did above select: custom, add the code in the box below. Editable when viewing a record: Set this to "yes" And click: Save! STEP 6: Now the Page steps. Ok, go to Pages -> Pages -> Add Page -> Select: Page Builder: Name: you want to make a new page for this: name it bugs/bugtracker, bureports or your own name page filename: bugtracker? Theme: Default Theme Template: Single Column Then add the meta and stuff you want If you want to add the page to menu, do that to Oke, select permission, and then click on SAVE STEP 7: Go to pages again, and click on Page Builder - the little grey box on the left side, in the middle Okay, so the page went up, now you are seeing the awesome page you just made, so, on the LEFT side you the Block Manager, oke, so go to: Pages -> DRAG the "Database" out on the "mid field", or the top field. Click now on: EDIT - Select the database you made and, click "Finish Editing on the left side menu: block manager, at the bottom. And you are ready to go to report sum bugz, happy bugin' STEP 1: How to make the Status destriptions Okay, so, go to the support page you just made, click on this: so the block manager pops up on the left Go on Pages, and drag: WYSIWYG Editor to the sidebar, and EDIT, add this code: <p><strong>Status Definitions</strong></p><p><span class="ipsBadge ipsBadge_style5">Pending</span> = We are still working on this report.</p><p><span class="ipsBadge ipsBadge_style4">Fixed</span> = The issue has been fixed and the resolution will be available in the next version.</p><p><span class="ipsBadge ipsBadge_style6">Closed</span> = Feedback or opinion better posted on our forum for discussion. Also for reports we cannot reproduce or need more information. In this case just add a comment and we will review it again.</p> and click on, Save, and then click on: Finish Editing1 point
-
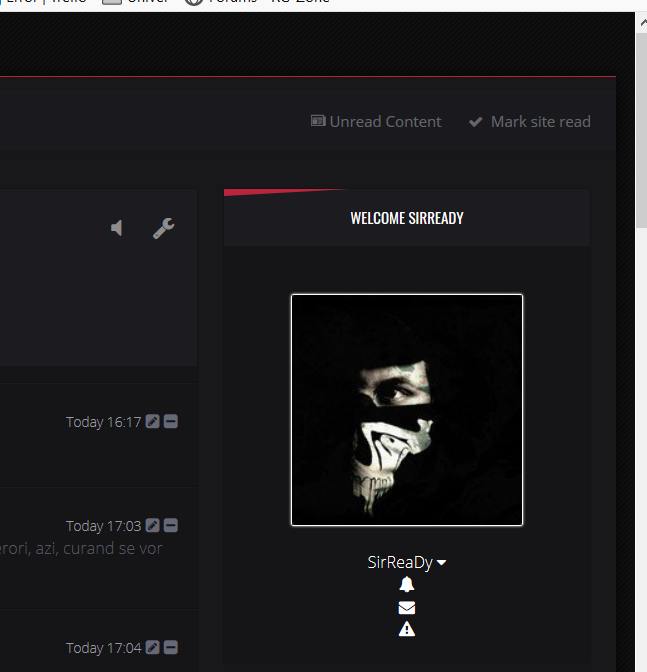
Hello, today will show you how to show the userbar in a different way, on your sidebar. Create a new HTML block, and paste the following: {{if \IPS\Member::loggedIn()->member_id }} <h2 class="ipsWidget_title ipsType_reset" align="center">Welcome {{if isset( $_SESSION['logged_in_as_key'] )}}{lang="front_logged_in_as" sprintf="$_SESSION['logged_in_from']['name']"} {{endif}}{member="name"}</h2> <br> <br> <center> <li id='cAuthorPane_photo'> {template="userPhoto" group="global" app="core" params="\IPS\Member::loggedIn(),'big' "} <br><br> <a href='#elUserLink_menu' id='elUserLink' data-ipsMenu> {{if isset( $_SESSION['logged_in_as_key'] )}}{lang="front_logged_in_as" sprintf="$_SESSION['logged_in_from']['name']"} {{endif}}{member="name"} <i class='fa fa-caret-down'></i> </a> <br> <li class='cNotifications cUserNav_icon2'> <a href='{url="app=core&module=system&controller=notifications" seoTemplate="notifications"}' id='elFullNotifications' data-ipsTooltip title='{lang="userbar_notifications" escape="true"}' data-ipsMenu data-ipsMenu-closeOnClick='false'> <i class='fa fa-bell'></i> <span class='ipsNotificationCount {{if !member.notification_cnt}}ipsHide{{endif}}' data-notificationType='notify' data-currentCount='{member="notification_cnt"}'>{member="notification_cnt"}</span> </a> <div id='elFullNotifications_menu' class='ipsMenu ipsMenu_wide ipsHide'> <div class='ipsMenu_headerBar'> <a href="{url="app=core&module=system&controller=notifications&do=options" seoTemplate="notifications_options"}" class="ipsType_light ipsPos_right"><i class="fa fa-cog"></i> {lang="notification_options"}</a> <h4 class='ipsType_sectionHead'>{lang="notifications"}</h4> </div> <div class='ipsMenu_innerContent'> <ol class='ipsDataList ipsDataList_readStatus' data-role='notifyList' data-ipsKeyNav data-ipsKeyNav-observe='return' id='elNotifyContent'></ol> </div> <div class='ipsMenu_footerBar ipsType_center'> <a href='{url="app=core&module=system&controller=notifications" seoTemplate="notifications"}'><i class='fa fa-bars'></i> {lang="see_all_notifications"}</a> </div> </div> </li> {{if !\IPS\Member::loggedIn()->members_disable_pm and \IPS\Member::loggedIn()->canAccessModule( \IPS\Application\Module::get( 'core', 'messaging' ) )}} <li class='cInbox cUserNav_icon2'> <a href='{url="app=core&module=messaging&controller=messenger" seoTemplate="messaging"}' id='elFullInbox' data-ipsTooltip title='{lang="userbar_messages" escape="true"}' data-ipsMenu data-ipsMenu-closeOnClick='false'> <i class='fa fa-envelope'></i> <span class='ipsNotificationCount {{if !\IPS\Member::loggedIn()->msg_count_new}}ipsHide{{endif}}' data-notificationType='inbox' data-currentCount='{member="msg_count_new"}'>{member="msg_count_new"}</span> </a> <div id='elFullInbox_menu' class='ipsMenu ipsMenu_wide ipsHide' data-controller='core.front.core.messengerMenu'> <div class='ipsMenu_headerBar'> <a href='{url="app=core&module=messaging&controller=messenger&do=compose" seoTemplate="messenger_compose"}' data-ipsDialog data-ipsDialog-title='{lang="compose_new"}' data-ipsDialog-remoteSubmit data-ipsDialog-destructOnClose data-ipsDialog-flashMessage="{lang="message_sent"}" id='elMessengerPopup_compose' class='ipsPos_right ipsButton ipsButton_primary ipsButton_verySmall'>{lang="compose_new"}</a> <h4 class='ipsType_sectionHead'>{lang="userbar_messages"}</h4> </div> <div class='ipsMenu_innerContent'><ol class='ipsDataList' data-role='inboxList' data-ipsKeyNav data-ipsKeyNav-observe='return' id='elInboxContent'></ol></div> <div class='ipsMenu_footerBar ipsType_center'> <a href='{url="app=core&module=messaging&controller=messenger" seoTemplate="messaging"}'><i class='fa fa-bars'></i> {lang="go_to_inbox"}</a> </div> </div> </li> {{endif}} {{if \IPS\Member::loggedIn()->canAccessModule( \IPS\Application\Module::get( 'core', 'modcp' ) ) and \IPS\Member::loggedIn()->modPermission('can_view_reports')}} <li class='cReports cUserNav_icon2'> <a href='{url="app=core&module=modcp&controller=modcp&tab=reports" seoTemplate="modcp_reports"}' id='elFullReports' data-ipsTooltip title='{lang="userbar_reports" escape="true"}' data-ipsMenu data-ipsMenu-closeOnClick='false'> <i class='fa fa-warning'></i> {{if \IPS\Member::loggedIn()->reportCount()}}<span class='ipsNotificationCount' data-notificationType='reports'>{member="reportCount()"}</span>{{endif}} </a> <div id='elFullReports_menu' class='ipsMenu ipsMenu_wide ipsHide'> <div class='ipsMenu_headerBar'><h4 class='ipsType_sectionHead'>{lang="report_center_header"}</h4></div> <div class='ipsMenu_innerContent' data-role="reportsList"></div> <div class='ipsMenu_footerBar ipsType_center'> <a href='{url="app=core&module=modcp&controller=modcp&tab=reports" seoTemplate="modcp_reports"}'><i class='fa fa-bars'></i> {lang="report_center_link"}</a> </div> </div> </li> {{endif}} </center> <br> {{endif}} Now, to remove the userbar from the top, go to: core -> global ->framework -> global.css Find the code: #elUserNav > li > a, #elFooterSocialLinks > li > a { color: #fff; font-size: 13px; vertical-align: middle; line-height: 1; } and add inside : visibility: hidden; Should look like this: #elUserNav > li > a, #elFooterSocialLinks > li > a { color: #fff; font-size: 13px; vertical-align: middle; line-height: 1; visibility: hidden; } Go to custom css: and add this option: /* Userbar */ .theme_userbar {position: absolute; right: 0; top: -55px; width: 30%;} #elUserNav > li > a .fa, #elUserNav_mobile > li > a .fa { visibility:hidden; } If there is already such class, just add the visibility: hidden; Also in custom.css add : .cUserNav_icon2 a { position: relative; /* Needed for notification bubbles */ color: #fff; } You can add the group, rank name etc. You can also integrate the templates from the enhanced user plugin, or the enhanced profile blocks to add more data. Adding followers/ social info is as simple as copy paste. Works for each member individually . Enjoy
1 point
-
That's custom CSS need to display subforums in columns as well some retouch to global. PS: Solved1 point
-
The source button might be disabled. I am pretty sure pasting as source will solve your problem1 point
-
You have to paste the code as "SOURCE" in the WYSIWYG editor. Press the source button once.
1 point
-
You're welcome ?1 point
-
https://webflake.sx/settings/ Change the password there. You can just use your username and the new password. Ex: I used google to connect, changed my password, disconnected google, and logged in with the username.1 point
-
Kiwi.luxaeterna says hellow i´m new at the community, nice too see you1 point
-
You could create a new group banned, or if it is, use the same statement from the frames tutorial,and redirect them to the new page. _xfRedirect. is used to redirect. php <xf:if is="{$user.user_group_id} == 6"> return $this->responseRedirect( XenForo_ControllerResponse_Redirect::SUCCESS, XenForo_Link::buildPublicLink('forums', $forum), new XenForo_Phrase('forum', array('forum' => $forum['title'])) ); Or easiers make a redirect rule. RewriteRule ^(threads|forums|members|banned)/(.*)$ /community/$1/ [R=301,L] Its an example and wont work.Is to get you to the idea1 point
-
I don't really care what your opinion is. I'm only interested in the market statistics and those statistics say that WordPress is overwhelmingly more popular, as evidenced by the enormous disparity in downloads for WordPress and Joomla on our site. Our community clearly isn't interested in Joomla and nothing you say will change that. Down-vote me again. I don't care about that either. However, this topic is locked.1 point
-
Version 1.5.1
91 downloads
Key Features Clean and Responsive Design Built Using Bootstrap Totally Secure System Multilingual System (New language can be added easily) RTL Support Seo Optimized SEO-Friendly URL 10 Layout Colors Editable & Sortable Navigation (With mega menu) External Link & Dropdown Options for Navigation Responsive & Sortable Slider Responsive Ad Spaces for Any Kind of Ad Codes (Including Adsense) Create Ad Codes Adding Unlimited Fully Editable Pages Show & Hide Options for Page, Page Title, Page Breadcrumb, Page Right Column Gallery Page (Enable & Disable Option) Gallery Categories Contact Page (With Google Map) Search in Site Reading List Page (Add & Remove from List) Featured Posts News Ticker Emoji Reactions Add, Delete, Update Posts Video Post Option Audio Post Option(With Playlist) Scheduled Posts Save as Draft Option for Posts Add Multiple Images to a Post Add, Delete, Update Categories Add, Delete Photos Add & Remove Posts from Slider Newsletter (Send Html Email to All Registered Emails) Manage Registered Emails Lazy Image Loading Dynamic Tag System Ajax Comment System Facebook Comments Voting Poll (Add, Delete Unlimited Poll) Social Login (Facebook & Google) Social Sharing Social Media Links Sidebar Widgets (Add, Delete, Update widgets) Widget: Popular Posts Widget: Recommended Posts Widget: Random Posts Slider Widget: Tags Widget: Voting Poll Pageview Counts (Enable & Disable Option) Manage Comments Manage Contact Messages Advanced Post Options Database Cache System Roles & Permissions System Follow & Unfollow Users Email Verification Sitemap.xml Generator RSS Aggregator System (Auto Update with Cron Job) (Doesn’t support full-text RSS) RSS Feeds (With different channels) More Than 30 Font Options Rich Text Editor (Image and Video Can Be Added) Membership System with 3 Roles (Admin, Author, User) Manage Registered Users Ban User Accounts Change User Role Admin & Author Profile Page Enable & Disable Membership System Enable & Disable Comment System Secure Authentication Password Reset Google Analytics Advanced Settings Options Visual Settings Change Logo, Favicon, Site Title, Site Description, etc. from Admin Panel Easy Installation Using Installation Wizard Detailed Documentation Runs on PHP 5.5+ (and PHP 7) Security Cross-Site Request Forgery (CSRF) Prevention Cross-Site Scripting (XSS) Prevention Password Hashing Avoiding SQL Injection Requirements PHP >= 5.6 cURL PHP Extension Mbstring PHP Extension Tested and works fine.1 point -
Version 1.0.2
732 downloads
A dark template for the latest version of IPS 4.3.x, which has a very advanced configuration in the ACP (including a top in the style of fixed, changing the display of the subforum, layout of the header and other visible in the gallery), which allows you to adapt it to every requirement. This theme is fully responsive.1 point -
Version 4.3.3
345 downloads
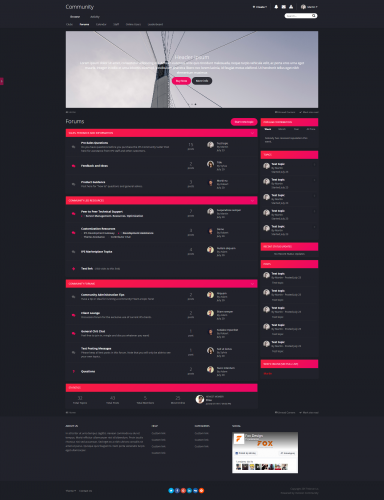
Virus Total scan: https://www.virustotal.com/#/file/7f30f91fd1e8ecba6c393c7bd6055754bad85acda1b03d2a38475c216aa7fcca/detection Beaufitul Dark Theme for IPS 4.3 Features Slider Advanced Footer Slider with a lot of options: Align header, content and buttons Vertical and horizontal slides! Permissions slider and slides Fullscreen and container slider size. Specific pages where show slider Pagination buttons Navigation buttons Background color and image for per slide Height slider Effect transitions Autoplay mode Loop mode Footer 4 blocks with customization width Permissions for per block Background footer Social links Comming soon more features!1 point
.thumb.png.267184132e48b991c16493df416343ce.png)


This leaderboard is set to New York/GMT-05:00