
Advertisement
Leaderboard


Popular Content
Showing content with the highest reputation on 07/09/2016 in all areas
-

Version 1.1.2
172 downloads
Don't be a leech, click the reputation button if you want to get more files in the future. This plugin will record each visit made by users from selected groups to topics of specific forums. Settings: Record single visit: if disabled, a flood control setting will appear to set a number of minutes to avoid recording consecutive visits to the same topic Groups that WILL NOT have their visits to the topic logged Forums Groups allowed to view the visitors list List sort by and list direction Guests are not logged Important: When I inherited this file there was a bug in the uninstall routine. A tiny syntax error. If you've never attempted to uninstall this file before just upgrade to the latest version and you should be fine. If you have attempted to uninstall before you may end up with problems trying to reinstall this ever again. You can try to clear out database elements (many places) and clear your IPS server directory of the plugin files and that may help or maybe it won't. All I have to go on is someone's very broken IPS installation and honestly I don't even think this plugin was ever the problem but it did get caught up in the mess. This file is unsupported! I'm releasing what is effectively a duplicate of this plugin with minimal support soon, and a paid (cheap) version with more template options that will have support. This file will remain as-is from this point forward. What's New in Version 1.1.2 Fixed uninstall routine1 point -
Version 1.0.5
154 downloads
Don't be a leech, click the reputation button if you want to get more files in the future. The plugin adds the button to easily return to top of page. It is slightly modified plugin (SB) BacktoTop • changed color and position of button; • fixed translation. Translation key is BacktoTop_title.1 point -
Version 1.0.1
277 downloads
Admin Login Background by IPS Themes adds the ability to select your own background image on the IPS Suite 4.0 administrator login page. Set a default image for all visitors of the login page or allow visitors to select from a series of images. Selections are saved in a cookie so all future visits will show the selected background. Features Set default image to show to all visitors of the admin pageUpload multiple images and allow visitors to select their own background image.Integrated with IPS4 Localizati1 point -
Version 1.0.1
58 downloads
Don't be a leech, click the reputation button if you want to get more files in the future. This plugin adds a "Create" button to the mobile layout. Just like the "Create" button in desktop view, now in mobile view you'll have quick access to create content for every section of your site. Compatible with Community Suite 4.1.7.1 point -
Here's a step-by-step guide on how to add a background changer to your IPB 3.x skin. This will work for pretty much any 3.x skin, and can also work for 4.x if you tweak it a little bit. This method used in this tutorial is not the same method I use, but it is the easiest one to implement. In this guide, I'll be setting this up on the default IPB skin. Note: This tutorial utilizes the FontAwesome font icon library and jQuery. I don't have FontAwesome or jQuery installed in my skin, what do I do? To install FontAwesome, go to your ACP > Look & Feel > (Your Skin) > Global Templates > globalTemplate. Find this: {parse template="includeCSS" group="global" params="$css"} And add this above it: <link href="https://maxcdn.bootstrapcdn.com/font-awesome/4.6.3/css/font-awesome.min.css" rel="stylesheet" /> Alternatively, if you don't want to externally link, you can read the docs on how to install it yourself. If you don't have jQuery installed, it will be mentioned in step 2. Onto the rest of the tutorial. 1) Go to your ACP > Look & Feel > (Your Skin) > CSS > ipb_styles.css. Find this: html, body { /* Safari has trouble with bgcolor on body. Apply to html tag too. */ background-color: #d8dde8; color: #5a5a5a; } body { font: normal 13px helvetica, arial, sans-serif; position: relative; } Replace it with this: body { background-color: #d8dde8; color: #5a5a5a; font: normal 13px helvetica, arial, sans-serif; position: relative; } And save. 2) Go to your ACP > Look & Feel > (Your Skin) > Global Templates > includeJS. At the very bottom of the template, add this: <script type="text/javascript" src="http://code.jquery.com/jquery-latest.min.js"></script> <script type="text/javascript" src="{$this->settings['js_base_url']}js/ips.bg_changer.js"></script> Note: If you already have jQuery installed on your skin, you don't need to add the first line. 3) Click the Add New Bit button to add a new skin template. Template Bit Name: bgChanger Add to Group: skin_global Leave the other 2 blank. 4) In your globalTemplate, find this: <ul class='ipsList_inline' id='community_app_menu'> Add this below it: {parse template="bgChanger" group="global" params=""} And save. 5) In your bgChanger template, add this inside of it: <li class="right"><a href="#" id="bg_toggle" data-tooltip="Background Changer"><i class="fa fa-picture-o"></i></a></li> <div id="bg_changer" class="hide"> <h3 class="maintitle">Background Changer <i class="fa fa-fw fa-times-circle clickable"></i></h3> <div class="ipsBox_container ipsPad short"> <ul> <li class="bg_1"></li> <li class="bg_2"></li> <li class="bg_3"></li> <li class="bg_4"></li> <li class="bg_5"></li> <li class="bg_6"></li> </ul> <div id="bg_input"> <input type="text" class="input_text" placeholder="Enter your image URL..." size="30" /> <input type="button" class="input_submit" value="Submit" /> </div> </div> </div> And save. 6) In your CSS, either in your ipb_styles.css or a custom.css file, add this: /**********************/ /* Background Changer */ /**********************/ #bg_changer { position: fixed; width: 50%; top: 15%; left: 50%; transform: translate(-50%); z-index: 9900; } #bg_changer .maintitle i { float: right; margin-top: 2px; } #bg_changer li { background-color: rgba(0, 0, 0, 0.5); background-attachment: initial; display: inline-block; vertical-align: top; width: 80px; height: 80px; margin: 0 5px; border-radius: 4px; cursor: pointer; transition: opacity 0.15s ease-in-out; } #bg_changer li:hover { opacity: 0.75; } .bg_1 { background: transparent url('{style_images_url}/backgrounds/bg_1.png') 0 0 / cover fixed; } .bg_2 { background: transparent url('{style_images_url}/backgrounds/bg_2.png') 0 0 / cover fixed; } .bg_3 { background: transparent url('{style_images_url}/backgrounds/bg_3.png') 0 0 / cover fixed; } .bg_4 { background: transparent url('{style_images_url}/backgrounds/bg_4.png') 0 0 / cover fixed; } .bg_5 { background: transparent url('{style_images_url}/backgrounds/bg_5.png') 0 0 / cover fixed; } .bg_6 { background: transparent url('{style_images_url}/backgrounds/bg_6.png') 0 0 / cover fixed; } .bg_custom { background-size: cover; background-attachment: fixed; } #bg_input { margin-top: 10px; } 7) After that, go into your FTP > public_html > public > style_images > (Your Skin). Create a new folder called "backgrounds" there. After that, grab 6 images you want to use (and make sure they're .png files, or if they're not then make sure to adjust the CSS accordingly). Upload your 6 images to the backgrounds folder and name them as bg_1, bg_2, etc... The folder should look something like this when you're done. 8) Open up your code or text editor and copy/paste this code into there: jQuery.noConflict(); jQuery(document).ready(function($) { var cookies = { 'bg': ipb.Cookie.get("bg_selection"), 'custom': ipb.Cookie.get("custom_bg") }; if (cookies['bg'] && cookies['bg'] !== "") { $("body").addClass(cookies['bg']); } else if (cookies['custom'] && cookies['custom'] !== "") { $("head").append("<style type='text/css'>.bg_custom { background-image: url('" + cookies['custom'] + "'); }</style>"); $("#bg_input input[type='text']").val(cookies['custom']); $("body").addClass("bg_custom"); } else { $("body").addClass("bg_1"); } $("#bg_toggle, #bg_changer .maintitle i").click(function(e) { e.preventDefault(); $("#bg_changer").stop().fadeToggle(); }); $("#bg_changer li").click(function() { var this_bg = $(this).attr("class"), bg_classes = "bg_1 bg_2 bg_3 bg_4 bg_5 bg_6 bg_custom"; $("body").removeClass(bg_classes).addClass(this_bg); ipb.Cookie.set("bg_selection", this_bg, 1); ipb.Cookie.set("custom_bg", "", 0); }); $("#bg_input input[type='button']").click(function() { var custom_url = $("#bg_input input[type='text']").val(), bg_classes = "bg_1 bg_2 bg_3 bg_4 bg_5 bg_6 bg_custom"; $("body").removeClass(bg_classes).addClass("bg_custom"); $("head").find("#custom_bg_css").remove(); $("head").append("<style type='text/css' id='custom_bg_css'>.bg_custom { background-image: url('" + custom_url + "') } </style>"); ipb.Cookie.set("custom_bg", custom_url, 1); ipb.Cookie.set("bg_selection", "", 0); }); }); And save it as ips.bg_changer.js. After you save the file, go to your FTP > public_html > public > js and upload it there. After that, you're done! Here's a screenshot of what it looks like after you're done with all of that, and a screenshot of the background changer itself when opened. And of course, feel free to customize it however you want, I just decided to keep it simple for this tutorial. If anybody doesn't want to use jQuery and instead just JavaScript/Prototype itself (which is already installed in IPB 3.x by default), feel free to let me know and I'll make a quick tutorial for you. Tutorial by Sanctuary of WebFlake.1 point
-
Version 1.0.0
170 downloads
It allows you add a copy to disable the right mouse button or by using the CTRL + C for the user groups that you want.1 point -
Version 1.0.0
59 downloads
JQuery plugin to bring social buttons on the left side of the forum.1 point -
Version 1.0.0
49 downloads
Installation instructions. 1. ADMIN CP -> CUSTOMIZATION -> THEMES -> ADD THEMES -> UPLOAD THEMES 2. CLICK BROWSE- (THEME).XML FROM YOUR COMPUTER. 3. CLICK NEXT. 4. WAIT FOR PROCESSING AND THEN THE THEME IS INSTALLED. Credits to Back.1 point -
Version 1.0.3
494 downloads
It is a skin based on the Steam Community. This is a BETA version so there may be errors. What's New in Version 1.0.3 Fixed appearance private messages Fixed background color in Chatbox app Added a table of servers Changed the hover color of links to blue Background loading of the page is now black Fixed appearance of a category in Files app Changed editor background in Chatbox app Updated skin to IPS 4.1.12.1 Fixed appearance download bar Credits to Dominic Malai.1 point -
I had the same issue a while back and made a support thread for it as well (which can be seen here), but the answer in there isn't very clear if you don't know what you're doing, so I'll tell you the steps. If you have access to PHPMyAdmin for your site, open it up, click on your database, finds the "members" table, and then click the Structures button at the top toolbar. Look for the title table and click on the change button (screenshot). After that, you'll see this. Change "64" to whatever number you want (a suggested amount would be 300). Save the changes and you're done! If you want an even easier way, here's the SQL you can run in the SQL Toolbox page instead of going through and changing it in PHPMyAdmin: ALTER TABLE `members` CHANGE `title` `title` VARCHAR(300); P.S. - You should check out this hook: It lets you edit a member's HTML member title via their account in the ACP, so you don't have to run an SQL query each time. Hope this helps!1 point
-
Here you go.1 point
-
Version 2.0
374 downloads
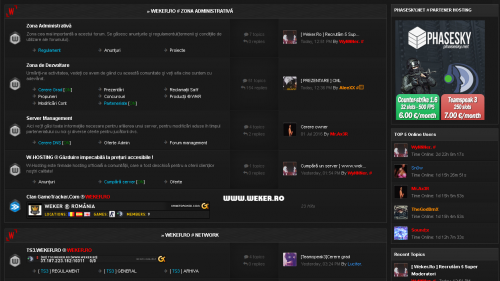
I'm back with an update at my skin, Weker.Ro Dark v1.5 . Updates: - font awesome added ; - more images added ; - resolved bugg's . Enjoy ! Dont; be leech, touch +1 ! Please keep the copyright !1 point -
42 downloads
[b]Virtuoso is a clean HTML /CSS vCard, perfect for creative individuals. [/b] With detailed documentation and annotated code, Virtuoso is extremely simple to set up and customize. The clean design features sections for a logo or avatar, your name and tagline, space to write about yourself, a ‘Download vCard’ button and an availability graphic (includes available and unavailable states). Besides the homepage, the theme also consists of three other pages which can easily be navigated to via the links in the footer. These include a ‘Work’ page to display a small selection of your work, a ‘Social’ page with icons for all major social sites, and a ‘Contact’ page for your contact details and address. All of these pages can be edited very easily and details of how to do so are included within the documentation.1 point


.png.855a6f03bf839adb3e9dde63aada4ee8.thumb.png.8be045a5957560e9b7cfe7a6f2d89d46.png)

This leaderboard is set to New York/GMT-05:00