
Advertisement
Leaderboard


Popular Content
Showing content with the highest reputation on 06/24/2016 in all areas
-
Facebook You can allows users to sign in on your community with their Facebook account. This is a great way to make it easier for users to get started on your community and increase the number of signups. In addition, users who sign in with Facebook can have their profile photo automatically synced with Facebook and can even import their status updates and allow them to automatically share content they post on your community to Facebook. This guide covers everything you need to know to set up this integration. Tip If you enable either the "Allow Status Imports?" or "Users can share immediately when posting?" settings for Facebook login, make sure you read and follow the instructions in Step Five below. Step One: Create a Facebook App In order to use Facebook to log in on your community, you need to create an "application" through the Facebook Developer site. This gives Facebook some information about your community and a special key that is needed to complete the set up. Go to https://developers.facebook.com/apps and sign in with your Facebook account if you are not already signed in. Click the button to add an app in the top-right. Choose the option for a website. Type the name of your community and create the application. Leave the option about a test app off, choose the category which best matches your community and create the application. On the next screen, you can ignore the part about the SDK, and just fill in the URL to your site below. Click the link to to continue to the dashboard. Step Two: Update App Settings There's a few more pieces of information you need to give Facebook about your community before continuing. On the dashboard for your app on Facebook's site, click the "Settings" link the sidebar. Fill in a Contact Email and save the form. It is also a good idea to upload an App Icon so that when users sign in with Facebook they see your logo rather than a generic icon on the login screen. You can also set a Privacy Policy URL so users see a link to that on the sign in screen. These are normally optional, but if you intend to enable the "Allow Status Imports?" or "Users can share immediately when posting?" settings (discussed in Step Five), it is required. To do this: On the dashboard for your app on Facebook's site, click the "App Details" link the sidebar. Under "Contact Info" fill in any details you like. It is a good idea to include a Privacy Policy URL (which is required if you are going to enable the settings discussed in Step Five) but you can also fill in the other fields to show additional information on the sign in dialog. Under "Icons" upload a logo for your community and save the form. Step Three: Link your Facebook App with your Community Back on the dashboard for your Facebook App you will see a box like this at the top of the page: You need to copy and paste the App ID and App Secret into the Admin CP on your community. Go to Admin CP -> System -> Login Handlers and click the "Edit" icon for Facebook and enter those details on that screen. Tip If you enable either the "Allow Status Imports?" or "Users can share immediately when posting?" settings for Facebook login, make sure you read and follow the instructions in Step Five below. After saving, you need to enable the login handler. Make sure the badge next to Facebook says "Enabled", and click it to toggle if it doesn't. Step Four: Enable your App Now you need to set your Facebook App to be ready for use. Back on the dashboard for your app on Facebook's site, click the "App review" link the sidebar. Click the toggle to make your application live and confirm the popup. Users will now be able to sign in with Facebook on your community. Optional Step Five: App Review for Status Integration When setting up Facebook login, there are two settings which, if enabled, you need to perform additional steps to set up: "Allow Status Imports?" or "Users can share immediately when posting?". Because these settings allow your community to read from and write to the user's timeline on Facebook, Facebook requires that before you can use these features you must submit an application to them to review this functionality. If you want to enable either of these settings, you need to do the following: If you have not already uploaded an App Icon and set a Privacy Policy URL as discussed in Step Two, do that now. Enable the settings as desired and then sign in with Facebook on your site. You will see a message that some permissions have not been submitted for approval, you can ignore that warning for now and press "OK" to continue logging in. If you are enabling the "Users can share immediately when posting?" setting, you need to perform this action so that Facebook knows it works correctly. Submit a topic or other content on your community and when you do so, check the "Share on Facebook" checkbox. Back on the dashboard for your app on Facebook's site, click the "App review" link the sidebar. Click "Start a Submission". If you are enabling the "Allow Status Imports?" setting, check the "user_posts" checkbox. If you are enabling the "Users can share immediately when posting?" setting, check the "publish_actions" checkbox. Click the "Add X Items" button. If you are enabling the "Allow Status Imports?" setting, click the "Add Notes" button for the "user_posts" permission and fill in the form explaining how your community will allow users to import posts from the user's timeline into the statuses feature on your community. You will need to select the "Web" platform and provide both instructions and a screencast of how Facebook can test the feature. Suggested instructions are: If you are enabling the "Users can share immediately when posting?" setting, click the "Add Notes" button for the "publish_actions" permission and fill in the form explaining how your community will allow users to share content they create on your community to their Facebook timeline. You will need to select the "Web" platform and provide both instructions and a screencast of how Facebook can test the feature. Suggested instructions are: Upload at least 4 screenshots showing the Facebook integration on your site. For example, you might show the "Sign in with Facebook" button, the homepage after the user has signed in, the Facebook screen in Account Settings, and the "Share on Facebook" button on the topic submission screen. Submit the review. You should be advised how long the review will take. Once Facebook have approved your review, the additional features will be available on your community.1 point
-

Version 1.0.0
761 downloads
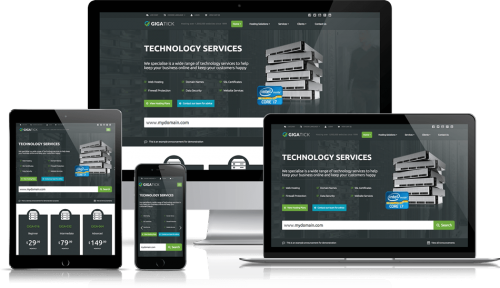
Purchased this $99.99 theme myself, felt like sharing with you people. Be sure the smash the button if you like this theme. ________________________________________________________________ Live Demo Sales Page1 point -
Version 4.1.x
1,300 downloads
Chameleon Dark is a dark adaptive skin which uses semi-transparent "frosted glass" content boxes, allowing your background image to partially show through. This allows you to easily customize the genre of the theme by changing only the background image. What's New in Version IPS 4.1.x - August 19, 2014: Fixed the "wizard" steps on the registration page (the arrow image from the light version of Chameleon was still being used). - August 28, 2014: Fixed Chrome 37 bug with post_controls - October 24, 2014: Upgraded for IP.Board 3.4.7 - July 2, 2014: Upgraded for IPS.Suite 4.x - July 5, 2015: Updated topic view code for fluid button row. Also includes numerous bug fixes from customer reports - July 20, 2015: Updated for IPS.Suite 4.0.10.2 plus numerous bug fixes and enhancements from the customer forums - July 20, 2015: Upgraded for IPS.Suite 4.0.11 - August 8, 2015: Upgraded for IPS.Suite 4.0.12.1 + numerous bug fixes and enhancements based on customer tickets - September 1, 2015: Upgraded for IPS.Suite 4.0.13 and built upon the "new" ipsfocus framework. - November 2, 2015: Upgraded for IPS.Suite 4.1.2 - November 2, 2015: Minor bug fixes solved from customer topics - November 3, 2015: Minor bug fixes solved from customer topics - November 10, 2015: Upgraded for IPS.Suite 4.1.3 plus numerous bug fixes and improvements to the navigation system - November 12, 2015: Improvements to navigation, z-index orders and framework bug fixes - November 13, 2015: Fixes a critical "Set as default" bug - December 8, 2015: Upgraded for IPS.Suite 4.1.5. Includes numerous bug fixes and a recoded snow/Christmas effect - December 11, 2015: Fixed a background issue on certain content boxes - January 17, 2016: Upgraded for IPS.Suite 4.1.7, including numerous enhancements and bug fixes - February 5, 2016: Upgraded for IPS.Suite 4.1.81 point -
Version 1.0.0
144 downloads
Don't be a leech, click the reputation button if you want to get more files in the future. Gives your members the opportunity to auto-embed documents, spreadsheets or presentations from Google Docs. Usage instructions are included in the ZIP file. Feel free to share this PDF with your members1 point -
Twitter You can allow your members to sign in to your website using their twitter account. In order to do this however, you first need to create an API key. Creating the twitter application First you need to go to the following URL and sign in using your twitter account. https://apps.twitter.com/ From here you will then need to select the "Create New App" button Once selected, you will be prompted to fill in the details for your site. Fill these in similar to the below, replacing the details I have entered with the details relevant for your site. Once done, agree to the disclaimer and click "Create your twitter application" Once you are done, you will see something similar the following screen there are now 2 things you need to check. First of all take a look in the settings tab and ensure that "Allow this application to be used to Sign in with Twitter" is checked. Then select the permissions tab and ensure it is set to "Read and Write" Once you have done both of these, you can get your application key and secret from the "Kets and Access Tokens" tab, which you will need to enter into your admin cp. Setting up the connection Within your admin CP, go to System>Settings>Login Handlers and select the pencil icon at the side of the twitter login method. You can then enter the details you generated above, choose which name to use for the account, and save. Tip You can also state if you would like Admin CP logins to be allowed using twitter authorisation from this page, and allow users to share their content immediately. This will give the user a checkbox they can select when creating new content1 point

This leaderboard is set to New York/GMT-05:00